First Case Change for a Classic Xbox Games Console
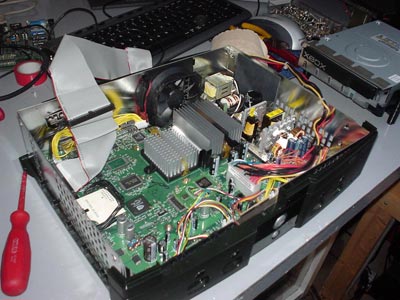
The original Xbox has always been a great candidate for case modding. The motherboard is compact, the PSU is separate from the board, and the whole platform is well documented after years of the modding scene pulling it apart. This project, which I'm calling X1, was my first attempt at moving a full Xbox out of its original shell and into something completely different: a second-hand CD player case.

Finding the donor case
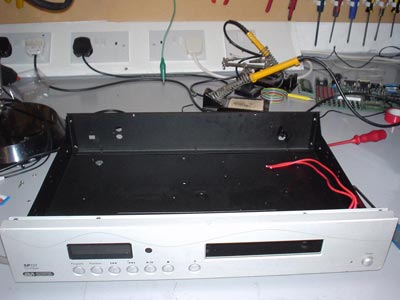
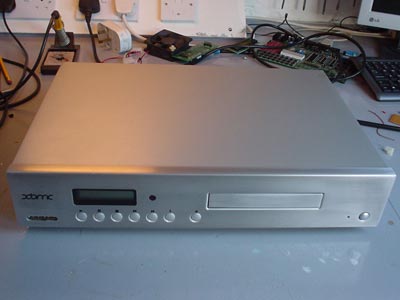
The case started life as an Acoustic Solutions SP121 CD player, which I picked up from a local second-hand furniture shop. It wasn't bought with this project in mind, it just happened to be the right size and shape, with a front fascia that already looked like it belonged on a piece of AV equipment rather than a games console.
Once I got it home, all of the original CD player electronics, the drive mechanism, the display board and the wiring were stripped out, leaving just the outer shell, the front panel, and the rear panel to work with.

Removing the DVD drive casing
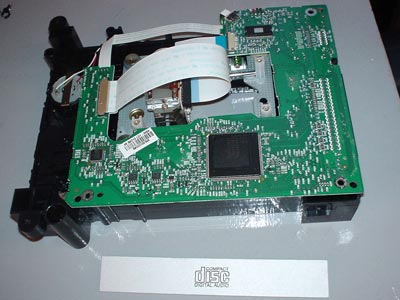
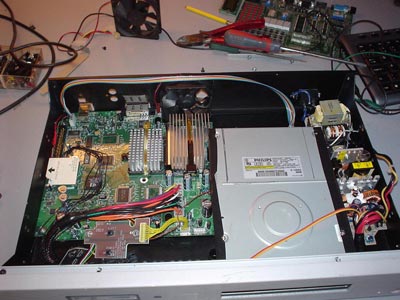
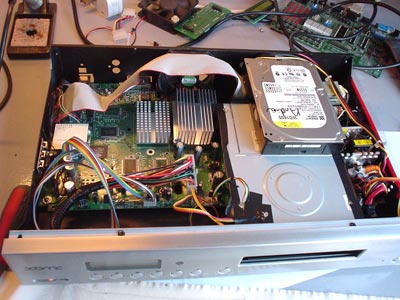
The first job was making the DVD drive fit inside the available space. The stock Xbox DVD drive casing is bulkier than it needs to be, so I removed the plastic housing and worked directly with the drive mechanism.

Fitting the motherboard and PSU
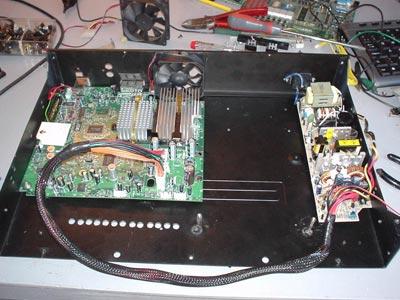
With the drive sorted, the next stage was finding homes for the Xbox motherboard and power supply. Both were mounted on standoffs and brackets, fixed to the case rather than sitting loose, which keeps everything rigid and stops the ports and connectors from flexing when cables are plugged in.
Because the PSU and motherboard were no longer in their original relative positions, the stock power cables were too short to reach. Rather than buy a loom of extension cables, I extended the existing wiring directly, cutting and soldering in the extra length needed and insulating each joint. It's not the tidiest way to do it compared to using proper connectors, but it's reliable and keeps the wiring low-profile inside a case that doesn't have a lot of spare room to hide a bulky splice.

Front panel work: USB and display
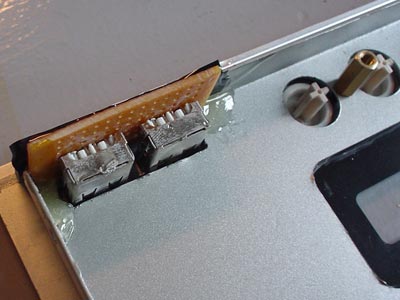
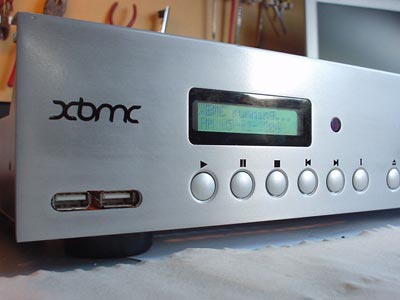
The front panel took the most work of any single part of the case. The Acoustic Solutions fascia was drilled and cut with a saw to open up mounting holes for a pair of USB sockets, giving the finished console easy access to USB storage and controllers from the front rather than relying on any rear-mounted ports. Both sockets are wired back to the motherboard's internal USB header using ribbon cable, which is flexible enough to route around the other components without putting any strain on the header itself.

Infrared receiver
The front panel also carries the console's display and IR receiver. The first LCD panel I fitted wasn't backlit, and it turned out to be nearly unreadable once the case was closed so I changed it for a backlit LCD panel model.
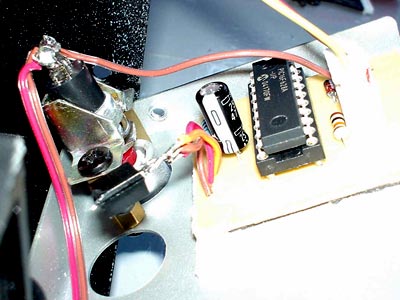
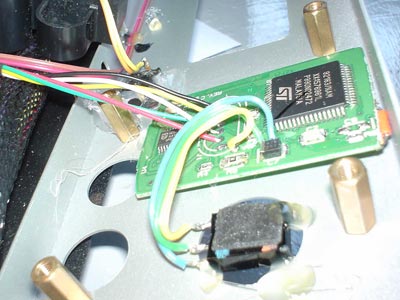
The Xbox's infrared receiver, needed so the console can still respond to the standard Xbox remote, was mounted behind the front panel using epoxy resin to hold it firmly in place, and wired back to the motherboard on ribbon cable in the same way as the USB sockets.

Remote power circuit
Rather than have a physical power button on show, the console is switched on using the Xbox remote control. This is handled by a small remote power circuit board that sits between the IR receiver and the Xbox motherboard's power button header, buffering the signal from the remote so that a power command from the remote is treated exactly like a press of the original power button.

Final build and Ventilation fix
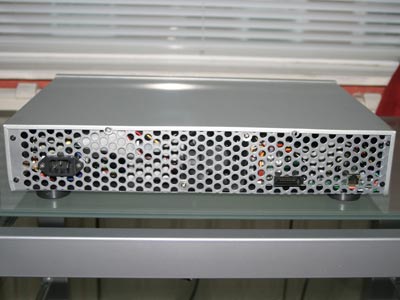
The first tests with the cover fitted showed we had overheating issues. The Xbox's stock cooling relies on a fairly clear path for air to move through the case, and the sealed CD player wasn't providing anywhere near enough airflow. Rather than cut large open vents into the outer panels and spoil the look of the case, I fitted an aluminium mesh panel to the rear, screwed directly to the rear panel in place of a section of the original solid backing. It gives the internals a proper path for air in and out while keeping the mesh itself low-profile enough that it doesn't stand out from the rest of the case.

Hard Drive
The hard drive was fitted onto the top of the DVD drive using double sided sticky pads and the ribbon cable was replaced with a much longer one to reach the headers on the motherboard.

Build time
All told, the build took a few days spread out around other things, with around six hours of hands-on work once everything is added up. Most of that time went into the front panel with measuring, cutting, and re-checking the fit for the USB sockets, display and IR receiver.

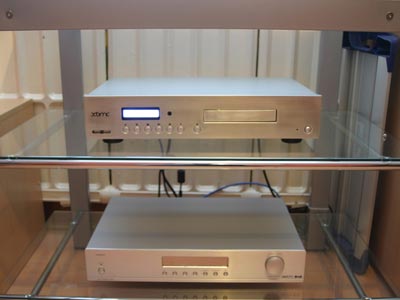
The finished console doesn't look like an Xbox at all sitting on a shelf, which was really the idea of starting with a CD player case rather than building an enclosure from scratch and so it would blend in with other HiFi equipment.


julio santos
Amazing project! I really love how you transformed the Xbox into a retro CD player style. It’s inspiring to see such creativity with old hardware. I’ve done some similar customizations on old PCs and shared some of the projects on my blog — maybe it could give some ideas for future mods: https://informatica279.blogspot.com/