Time for another addition to our ongoing home automation project, which Home Assistant powers on our small Linux server
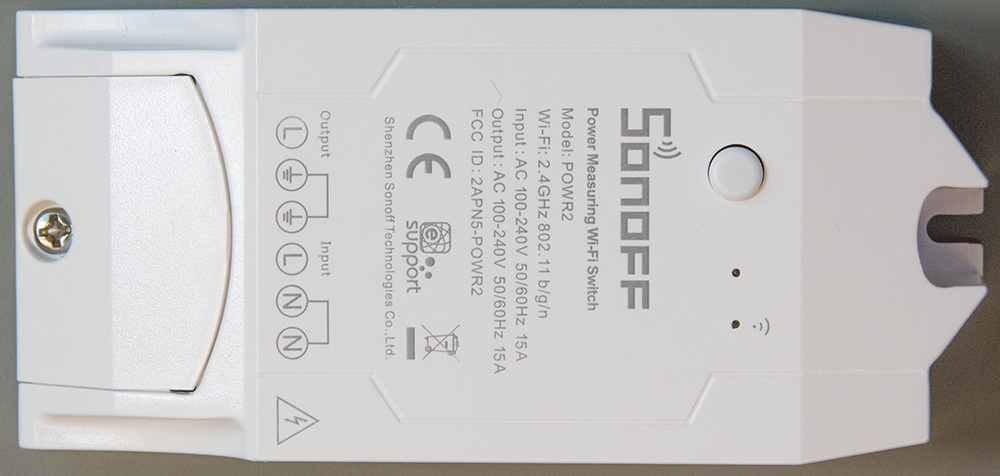
I decided it would be interesting to monitor the power consumption of our Miele washing machine and found the Sonoff POWR2 Smart Switch, which is rated for 15 amps. This should be more than enough for the power consumption of the washing machine during a washing cycle.
Our washing machine has a built-in timer to allow scheduled wash cycles, which we usually set at night to run early in the morning, so we didn’t need the Sonoff POWR2 to power the washing machine down. The easiest way was to remove the relay and bridge across the contacts with a thick wire while retaining the power-measuring functionality.
I also wanted to generate a notification when the wash cycle was complete based on the power consumption data.
I have done this with the Kasa Smart Plug by TP-Link model HS10 modification to reduce its power consumption when monitoring the network cupboard.
Installing the Tasmota firmware
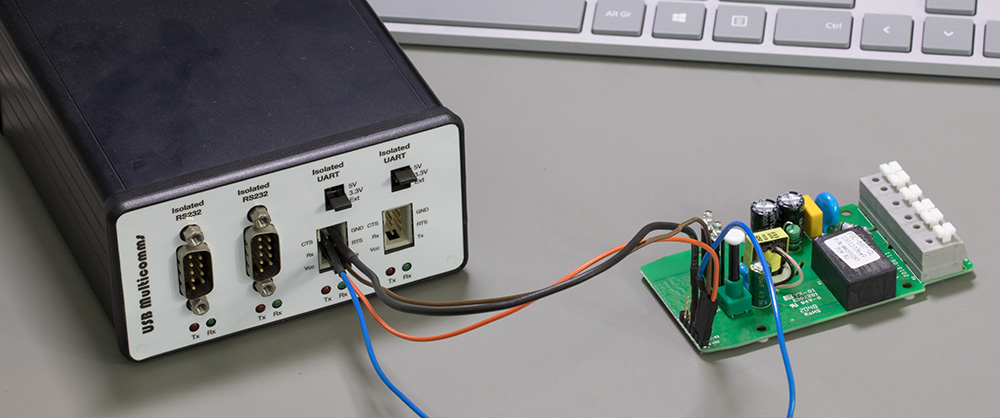
Before modifying the Sonoff POW R2, I had to install the Tasmota firmware using the excellent guide from notenoughtech.com and the Tasmotizer software.
The device was then connected to our Wi-Fi network, and the MQTT settings were updated to send and receive data from our MQTT server.
Using our Hopi power meter, we measured the power consumption of the Sonoff POW R2 and found that the average consumption was 0.6 watts with the relay turned off and 0.9 watts with the relay active.
Using the console on the devices web page, I set the initial power-on state to be powered on using the following:
PowerOnState 1
restart 1
The default period of the Tasmota firmware is to send the data every 300 seconds to the MQTT server, but as I wanted more frequent updates, this was changed with the following commands:
TelePeriod 10
restart 1
This set the data period to be every 10 seconds allowing our Home Assistant software to show much more detailed data for the energy usage of the washing machine.
To set a fixed IP address rather than use the DHCP server, this was changed with the following commands:
IPAddress1 10.0.0.125
restart 1
The complete list of available Tasmota commands is on their website at tasmota.github.io/docs/Commands/
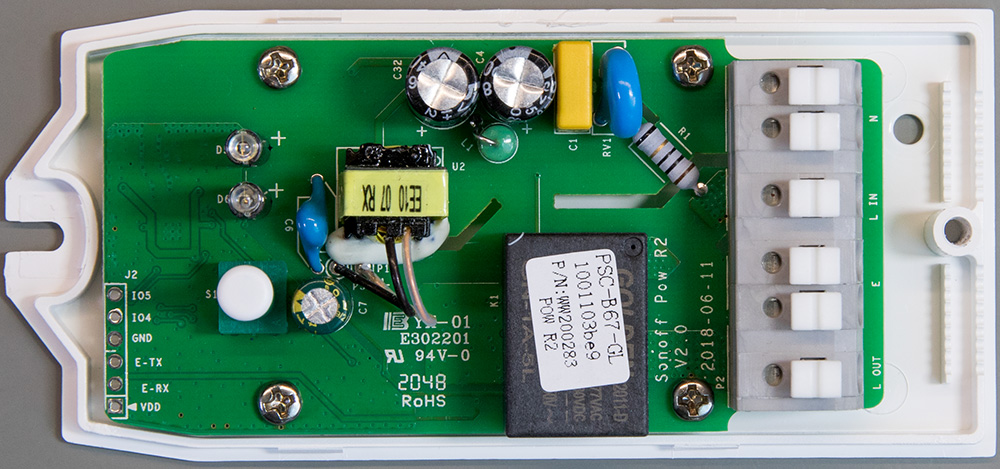
Removing the Relay
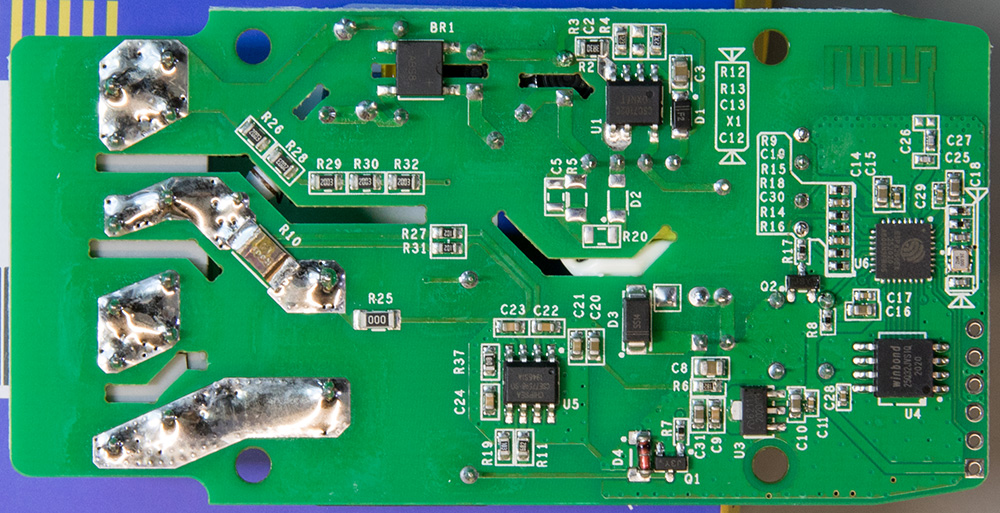
With the PCB removed from the plastic case for the firmware flashing, the relay was unsoldered using a pair of soldering irons and a flat blade to prise it away from the PCB.
A short length of 2mm copper wire was then soldered across the relay contact pins to bridge the circuit alongside the R10 current sense resistor.
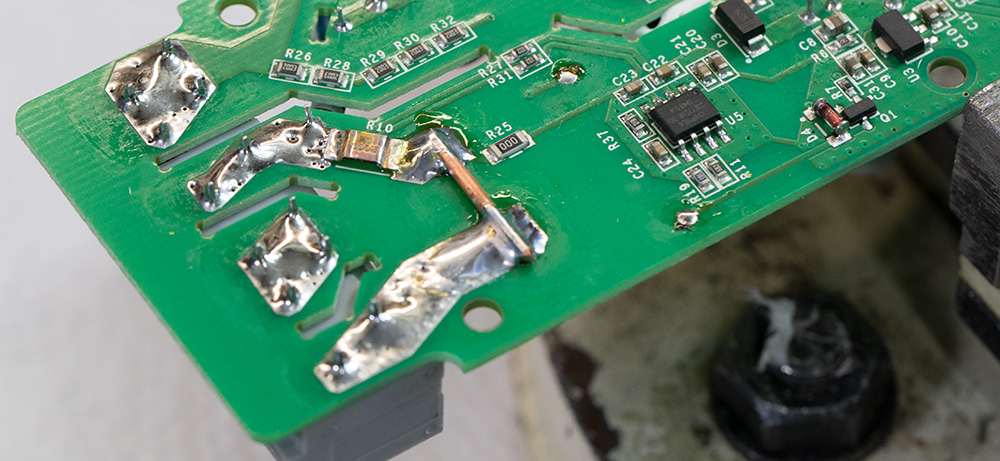
The unit was reassembled, a short power cable was connected to the input side, and a single trailing socket was fitted to the output to connect the washing machine.
Setting up Home Assistant
In the sensor.yaml file, the following lines were added to access the washing machine data within Home Assistant:
- platform: mqtt
  state_topic: "/home/devices/washingmachine/SENSOR"
  name: 'Washing Machine Reactive Power'
  unit_of_measurement: 'VA'
  value_template: "{{ value_json.ENERGY.ReactivePower }}"
- platform: mqtt
  state_topic: "/home/devices/washingmachine/SENSOR"
  name: 'Washing Machine Total Power'
  unit_of_measurement: 'kwh'
  value_template: "{{ value_json.ENERGY.Total }}"
- platform: mqtt
  state_topic: "/home/devices/washingmachine/SENSOR"
  name: 'Washing Machine Today Power'
  unit_of_measurement: 'kwh'
  value_template: "{{ value_json.ENERGY.Today }}"
- platform: mqtt
  state_topic: "/home/devices/washingmachine/SENSOR"
  name: 'Washing Machine Power'
  value_template: "{{ value_json.ENERGY.Power }}"
- platform: mqtt
  state_topic: "/home/devices/washingmachine/SENSOR"
  name: 'Washing Machine Current'
  unit_of_measurement: 'A'
  value_template: "{{ value_json.ENERGY.Current }}"
To be able to record daily usage within the new Energy tab within Home Assistant, a template sensor was added with the last_reset, state_class and device_class attributes with the following:
- platform: template
  sensors:
    main_washingmachine_energy:
      device_class: energy
      friendly_name: "Energy Washing Machine"
      attribute_templates:
        last_reset: '1970-01-01T00:00:00+00:00'
        state_class: measurement
        device_class: energy
      unit_of_measurement: 'kWh'
      value_template: "{{ states('sensor.washing_machine_total_power') }}"
      icon_template: mdi:mdi-current-ac
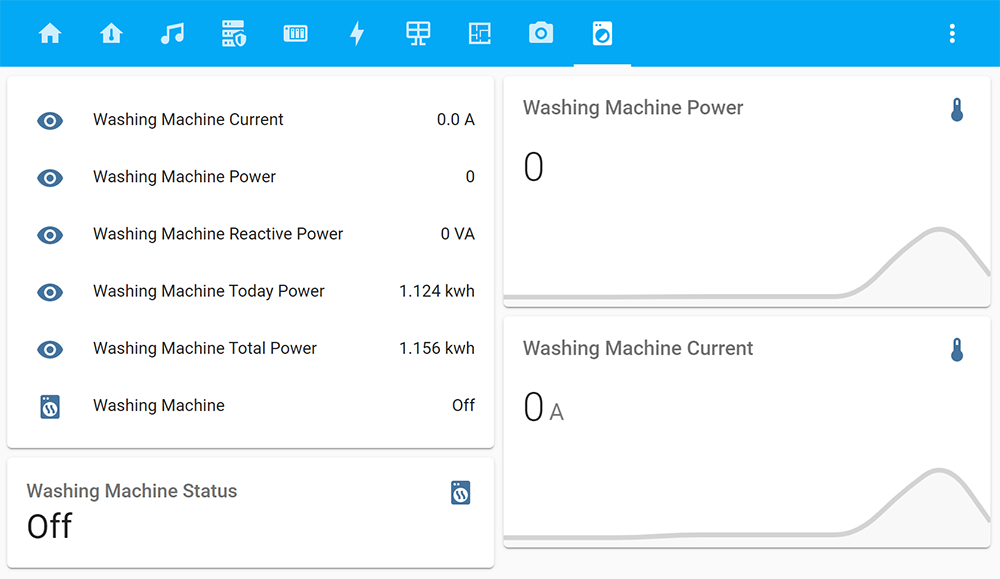
The screenshot below shows the new washing machine page I have added to Home Assistant, showing the different sensor readings and a daily usage graph.
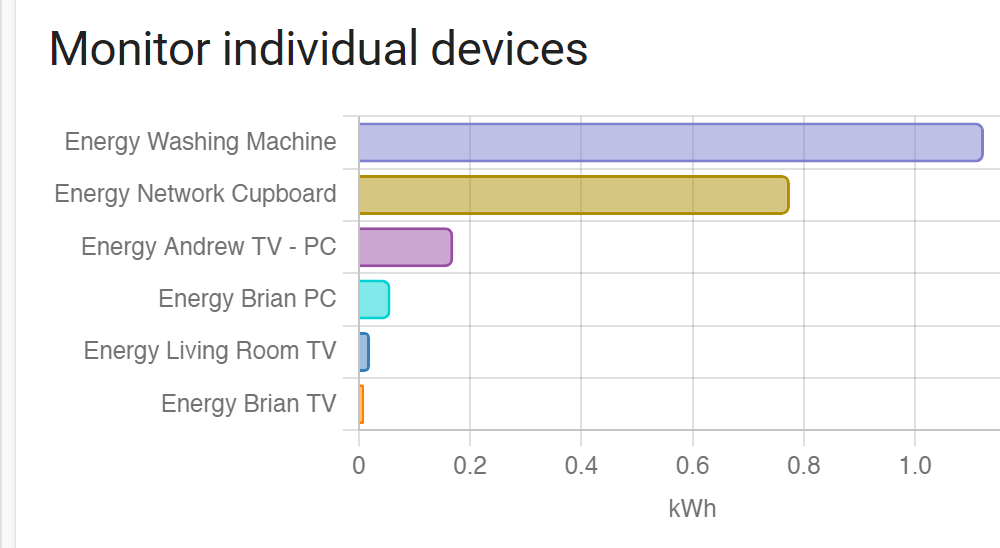
The Energy page now has the washing machine added to the Monitor individual devices section, and the screenshot below shows the usage after 3 wash cycles today.

Utkarsh Dixit
I want to use sonoff powr 2 to monitor run hours of a machine along with amp ,volt and power data. Switch will disconnect from power frequently witch makes all consumption data values to disappear in ewelink can you help me with a custom firmware to solve this problem.
I know nothing about programming.