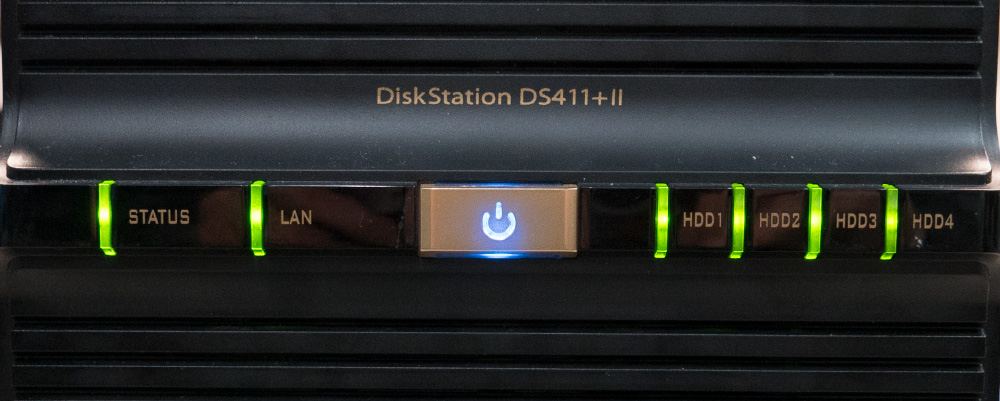
Around two years ago my Synology DS411+II network attached storage drive developed a fault where it would randomly fail to boot or power on with a flashing blue power button light and then after a random number of minutes later it would boot normally.
As the NAS was no longer reliable to use on a daily basis we replaced it with an eight-bay model.
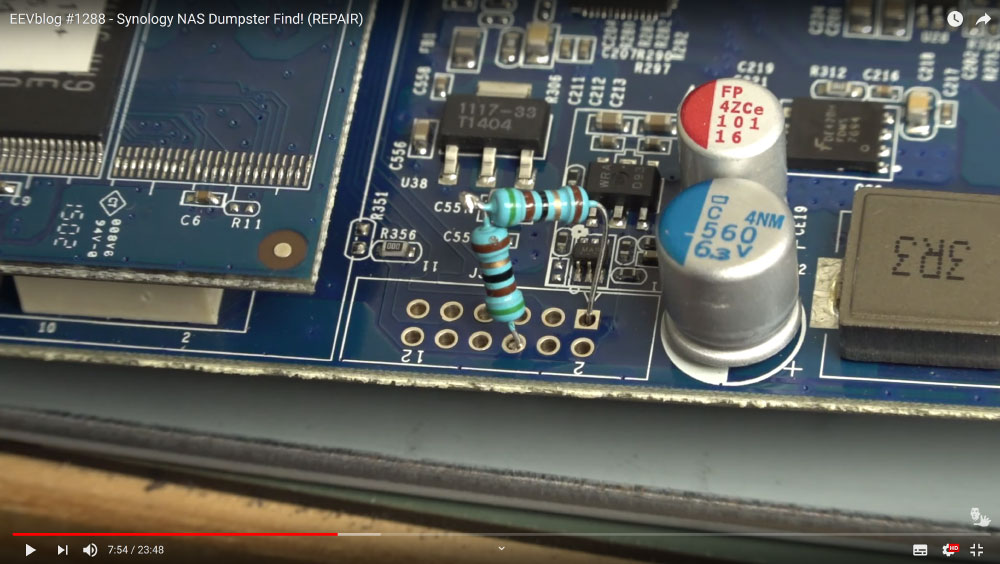
Today I watched a video from the EEVBlog YouTube channel showing the repair of a Synology DS415+ model which uses an Intel Atom C2538 processor. This processor has a known bug which stops the units from booting and was fixed by adding a 100-ohm resistor across two pins to pull up a clock line from the CPU.
As my own Synology DS411+II had a similar booting problem, I decided to take it apart to see if it had the same dual in-line header socket as the DS415+ version and see if adding the 100-ohm resistor would also fix my NAS unit.
Screenshot from EEVBlog YouTube video:
The Synology DS411+II uses an Intel Atom D525 and after searching online I wasn’t able to find any information about this CPU having the same boot clock issue, I thought I would try the resistor fix anyway to see if it would make the NAS usable again.
Accessing the motherboard involves the removal of the rear panel, and then removing 8 self-tapping screws which hold the metal drive bays to the base and front panel.
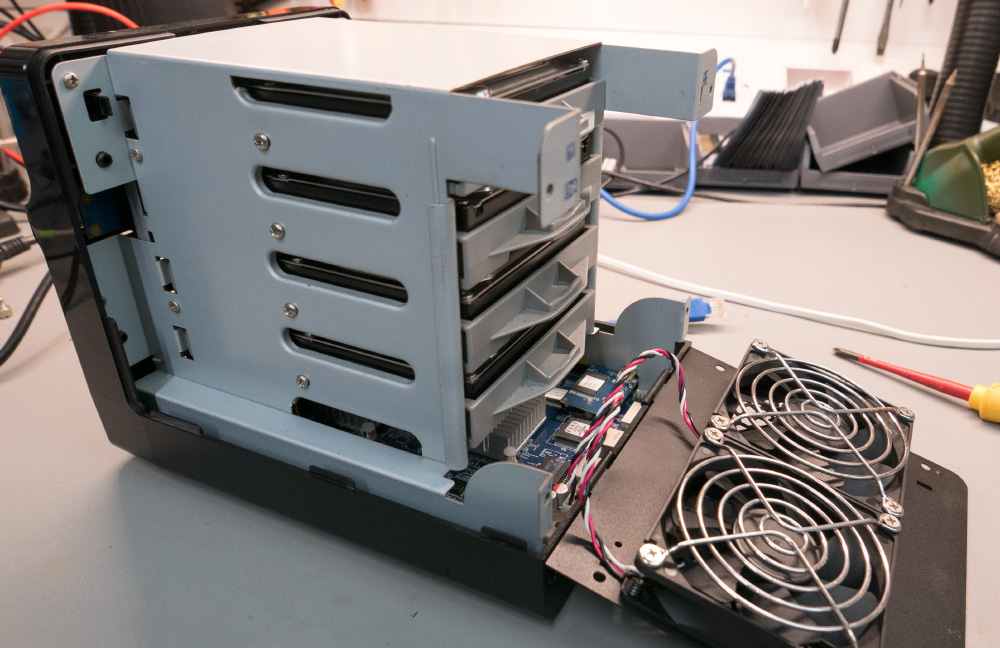
The front panel is removed by releasing 4 small plastic clips which hold the front to the drive bays and then disconnecting the multiway cable from the front panel PCB.
The bottom of the case is removed, and this reveals 4 bolts which hold the motherboard to the metal frame. Once these are removed the motherboard can be removed from the case by unplugging the front panel cable and disconnecting it from the hard drive riser board.
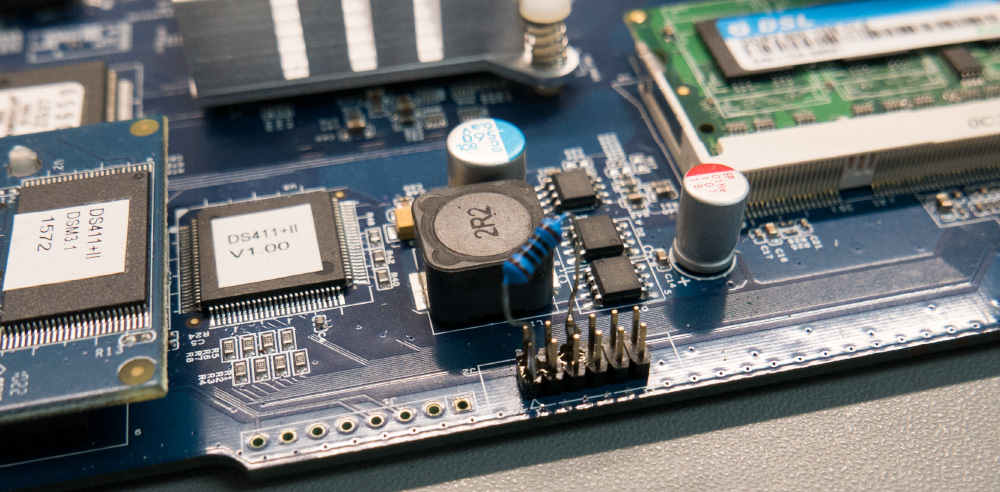
On the DS415+ the pins to which the pullup resistor is added are located on the side of the PCB and are a dual row 2.54mm header with 12 pins.
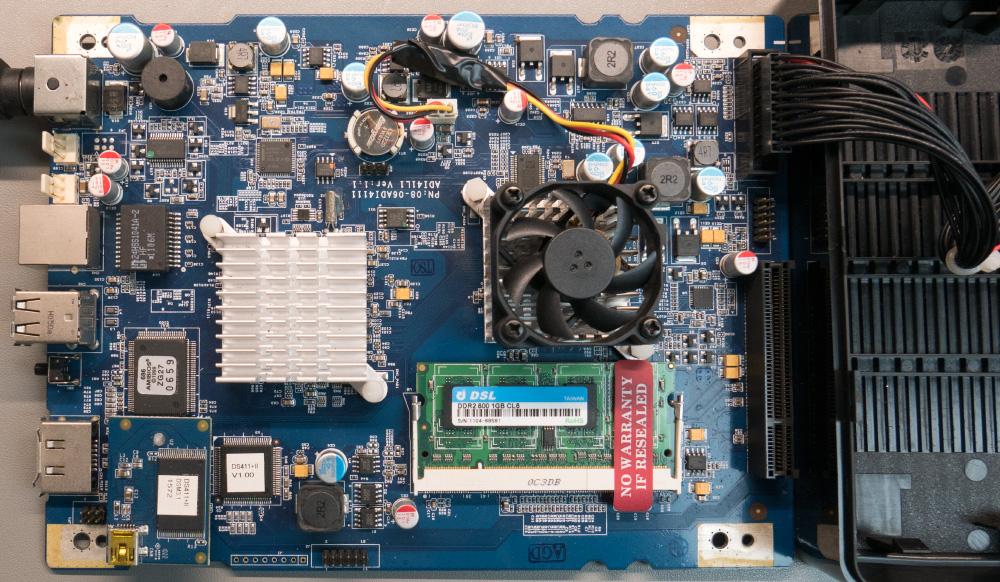
The DS411+II does not have the same layout but there is a single row of holes with a 2x6 header with a smaller pin pitch alongside.
I checked the pins using my oscilloscope and located the 3.3V and CPU Clock pins which had a very distorted clock signal.
On the DS411+II, pin 1 is marked with a small triangle on the PCB and the 100-ohm resistor needed to be soldered between pins 1 and 6 as shown in the photo below.
Powering on the motherboard without the drives connected showed that the blue power led had stopped flashing and the CPU fan started spinning showing that it was trying to boot.
I reassembled the NAS and once the drives had been installed again, I connected the power supply and after pressing the power button it booted normally.
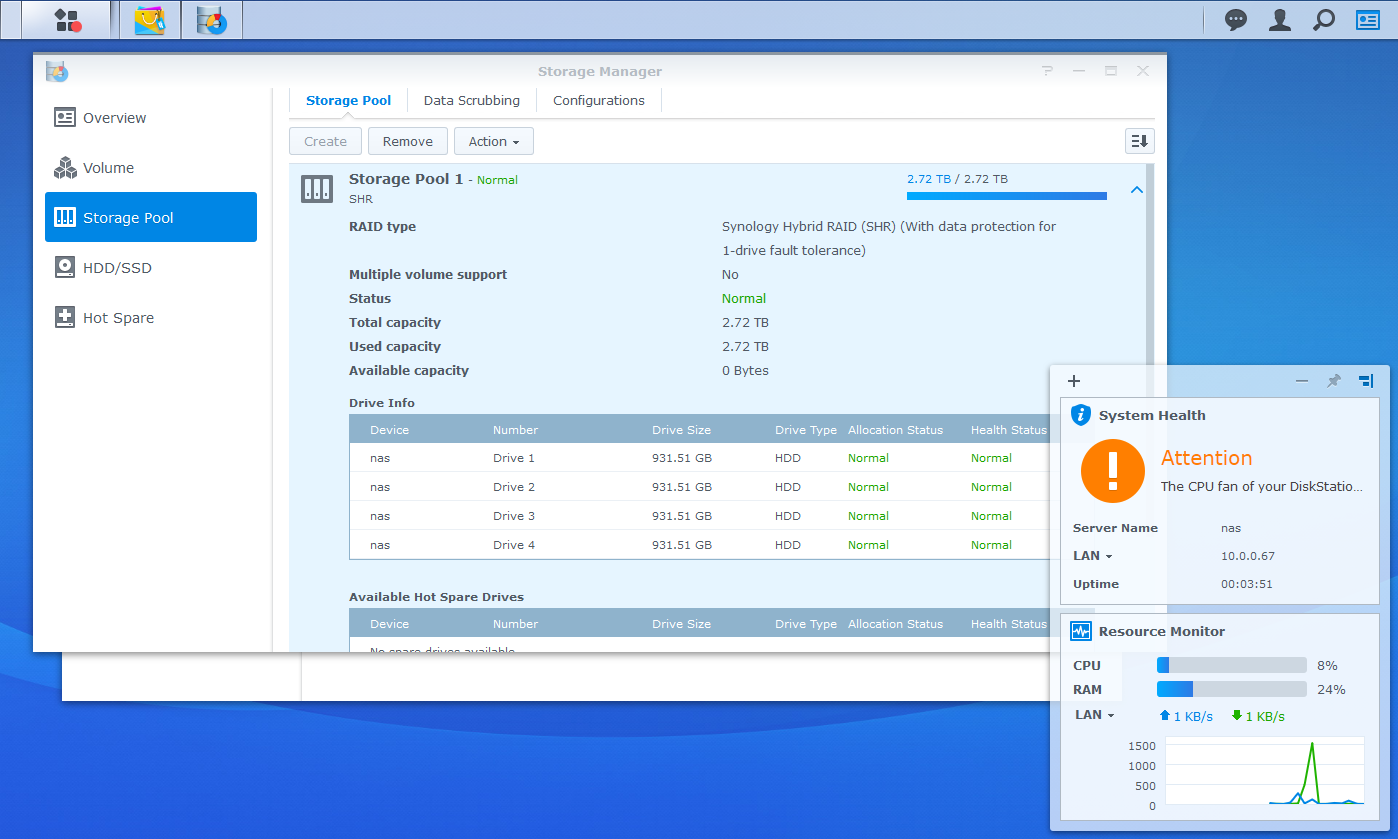
Checking the status of the unit from the web interface showed all the drives had been recognised and the data on the NAS was accessible via the network again.
The resistor had to be folded down to clear the metal drive bay case as there is very little clearance between the drive bay frame and the header. I added a strip of insulation tape to the metal frame to avoid any possible short circuits.
While the motherboard was removed, I checked the CPU fan and found the bearing has failed. I replaced this with a spare fan the same size and soldered the original fan connector to the new fan.
The new CPU fan is spinning OK, but the software was showing as a fan fault. This is due to a difference in the pulse output on the fan compared to the original Synology fan. The fan has a part number EC4010M12ER which is a Locked Rotor Sensor output on the third wire compared to a standard pulse output that normal PC fans use.
Searching for the part number on the fan resulted in new fans being available online but they are all from overseas suppliers.
A post on the Synology support forum gave an alternative part number of 1604KL-04W-B59-B00 which are compatible with Synology and so I ordered 2 of the fans from Digi-Key.
The fans cost £6.12 each but there is also a £12.00 shipping charge with Digi-Key which brought the total up to £30 with taxes. I ordered two fans so I would have a spare for future use.
The new fan arrived after a few days and after installing it, the fan error vanished.
I have four 1TB drives installed in the NAS and it gives a formatted capacity of 2.72TB using Synology Hybrid Raid (SHR) format which gives one drive fault tolerance.
I will run further tests on the NAS over the next few weeks, but this resistor fix appears to have solved the problem with the NAS not booting and it being usable again.
Eric
perfect, thank you for sharing, I just saved my ds 411+, a big thank you.
Cyrille
My DS415+ just... stopped booting. It is nearly 5 years old. Support has sent me a new power supply... just in case. So, I don't know if they know... or if they just follow a process to make me buy a new one.
I am not sure I am still good enough to fix it myself, I haven't used such tool in the last 25 years... (-:
But now I have information to deal with them. I really liked your video.
Thanks a lot.
Garry
The resistor fix did not work on my 415+ trying to locate nee main board with intel atom quad core 2.4ghz processor. I suspect this will be a no starter.
Jack
Any similar fix for the DS412+ ??
Poyski
DS412+ fix?
Len
My DS411+II suddenly shut down while displaying blinking lights. First time. Wouldn't reboot, just sat there blinking so I disconnected the power and waited awhile. Seems that does something because then it did boot, long enough at least to save some vital files but, alas, it shut down again. I tried the resistor fix but the problem persists. Did your fix stay good or did the problem return for you as well?
Brian
Len, Mine is still working. I don't have it powered on all the time but just use it as a off site backup which I sync once a month.
Olli
Hello,
fixed a 2416+ with this!!!
Thank You
Jan
Hey guys. I have a ds418 with almost the same problem, just it blinks only once and then stops. The ethernet lights are static on. The 418 has a Realtek RTD1296 CPU inside so I'm wondering if this could be a fix at all. The synology support just doen't want to help as always...
Ralf
There are different 100 Ohm resistors. 1 W or 0.6W, which one should I use?
Brian
I used a 0.6W resistor for my repair