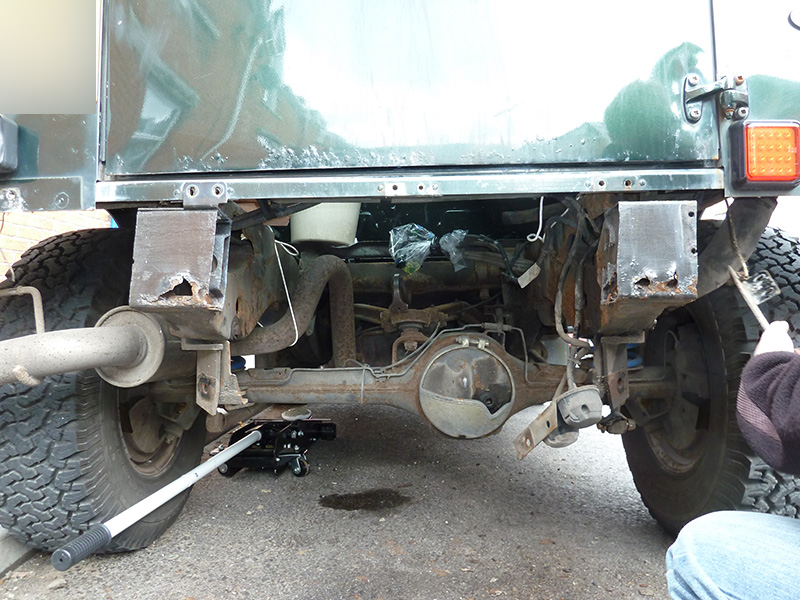
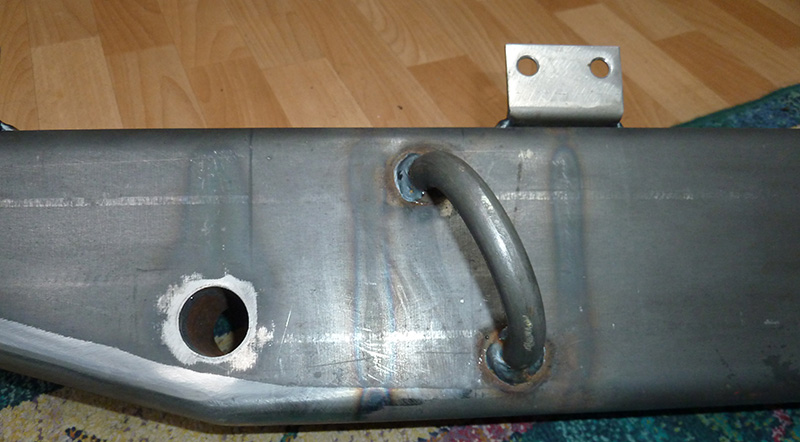
Earlier this year I ordered a Landrover Defender Replacement HD (heavy duty) cross member from blacksheepcrossmember.co.uk to replace the rear cross member on my Defender which was rusting fairly badly on each end due to the poor original design and had mud collection holes in either end which let the mud and rubbish in but didn’t drain out so they rusted badly from the inside out.
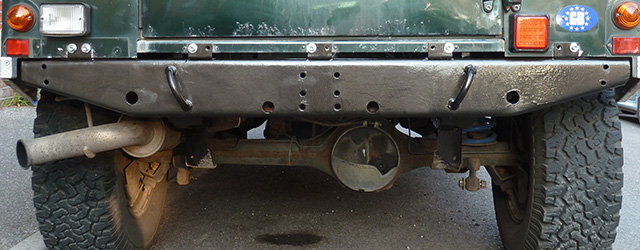
We had originally planned to replace the cross member later this year when the sun was shining but with the MOT being due in early July and after checking the state of the old cross member and finding that both ends had completely rusted through, we had to replace it with the heavy-duty cross member sooner than planned so it will hopefully pass the MOT without any problems.
This was the first chassis work on a vehicle which we have done for over 20 years and after trying our old Gasless Mig welder on some steal which was the same thickness as the chassis and finding that it didn’t give a good quality weld we decided to treat ourselves to a good quality Gas Mig welder Esab Caddy Mig C200i which will weld mild steels, aluminium and stainless steels.
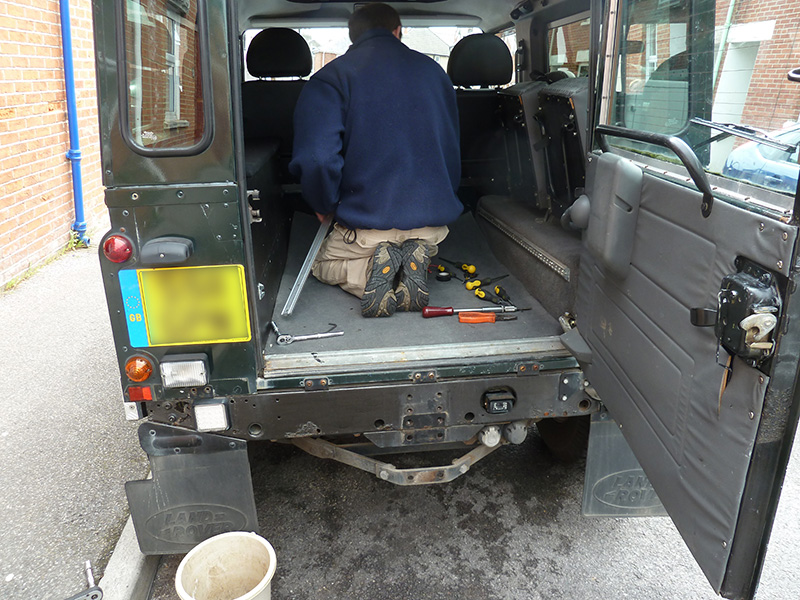
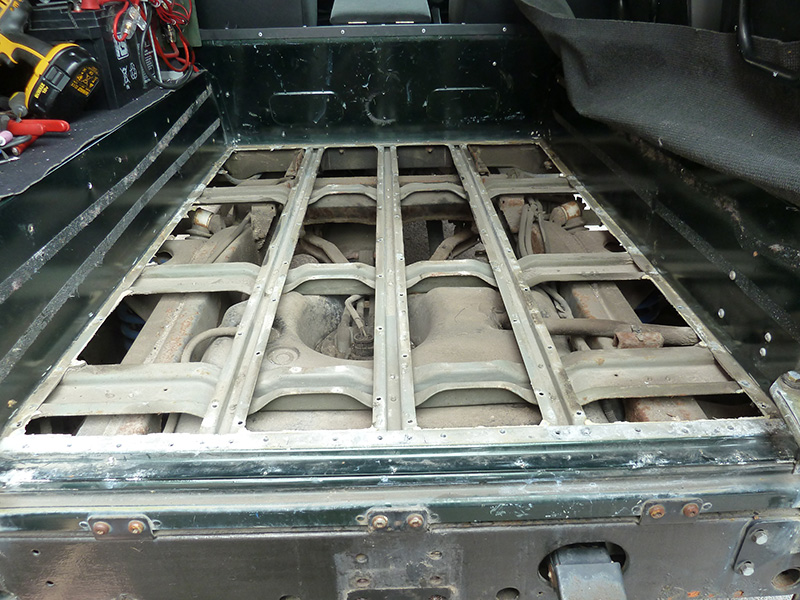
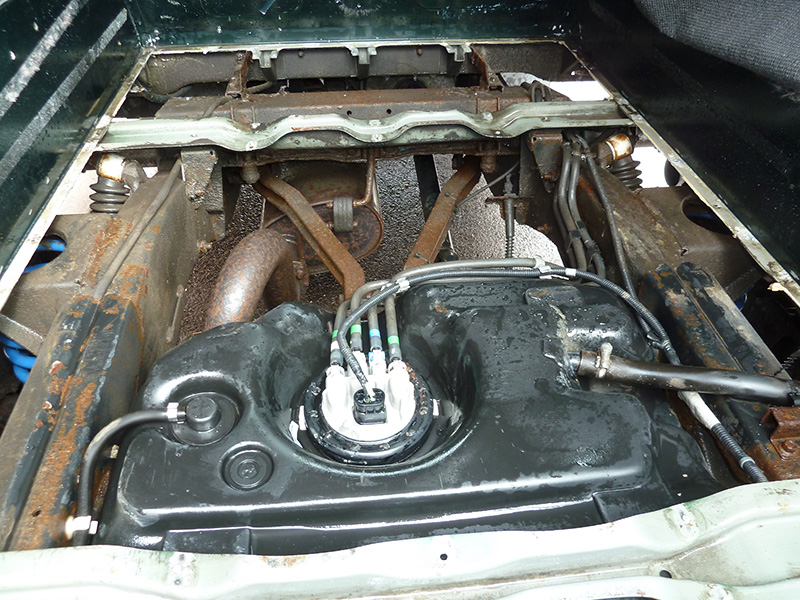
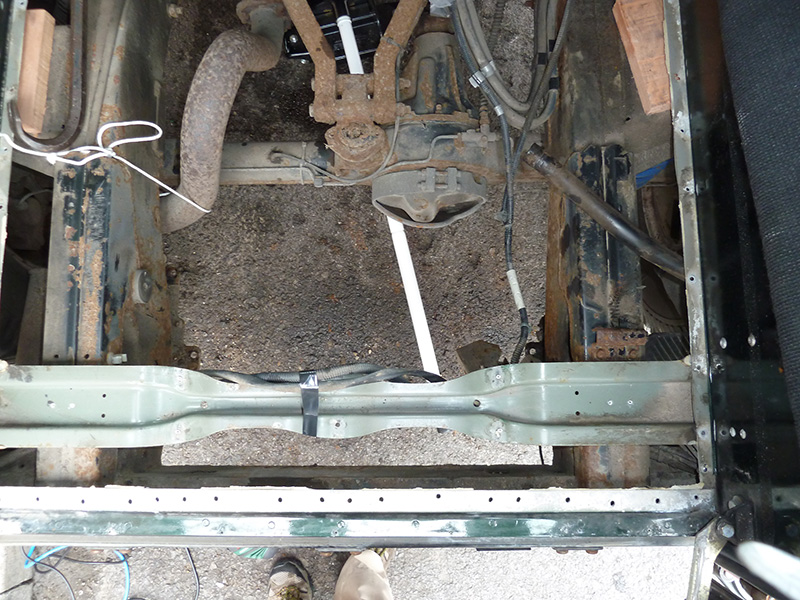
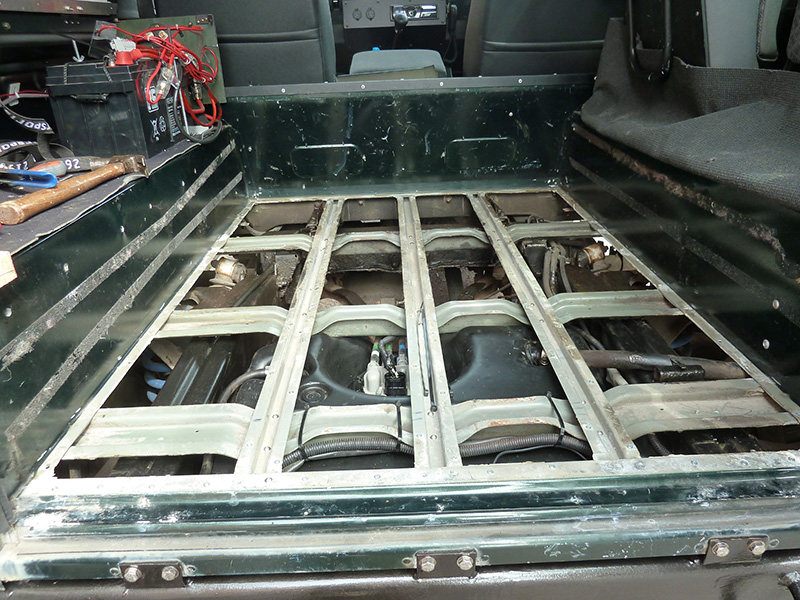
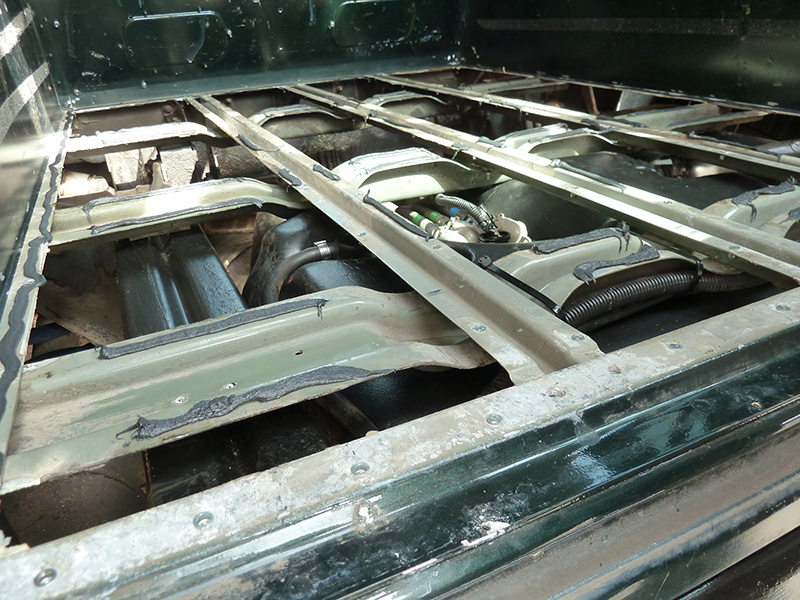
In order to have easy access to the chassis rails from all sides and to avoid damaging the fuel tank, we decided to remove the rear floor and fuel tank. The rear floor was held down to a frame using a mixture of raised rivets and flush rivets which all needed to be either drilled out or cut off with an angle grinder. This caused some minor scuff damage to the floor which was easily repainted when everything was fitted after the work was completed.
The fuel tank support plate/cradle was very rusty and 3 of the 4 bolts snapped off and the cradle had to be replaced. One of the bolts for the rear anti-roll bar also snapped in the chassis and this had to be drilled out and the thread tapped again.
The old cross member was removed in sections using a power saw and disk cutter which took a couple of days due to intermittent rain which kept stopping work.
Once the old cross member was removed the ends of the chassis rails were cleaned of any loose rust and the ends squared off to fit inside the mounting plates on the new heavy-duty cross member.
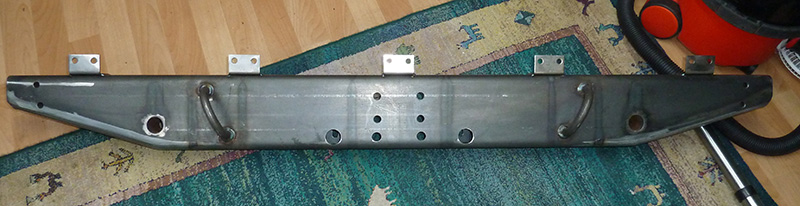
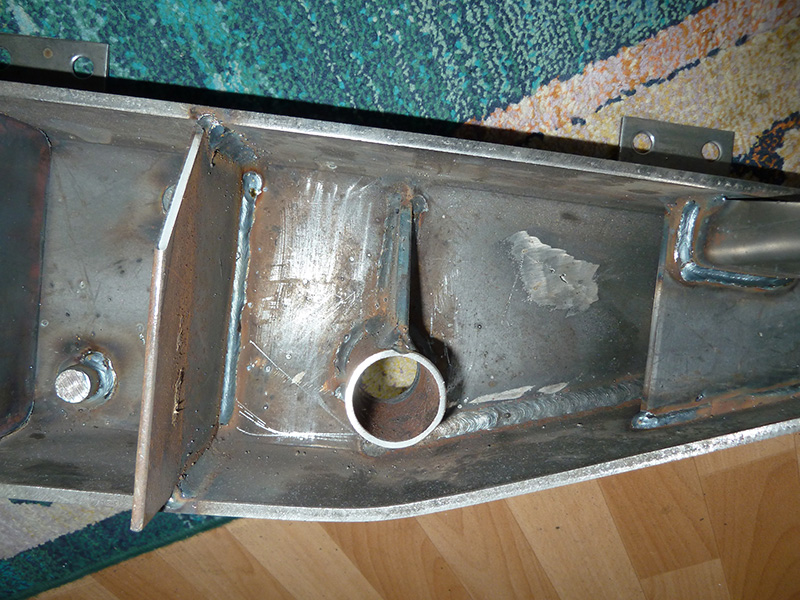
The new cross member was given several coats of Red Oxide primer and then a top coat of black Hammerite. The paint was removed on the areas which needed to be welded and once the welding was complete we repainted the new welds and mounting plates.
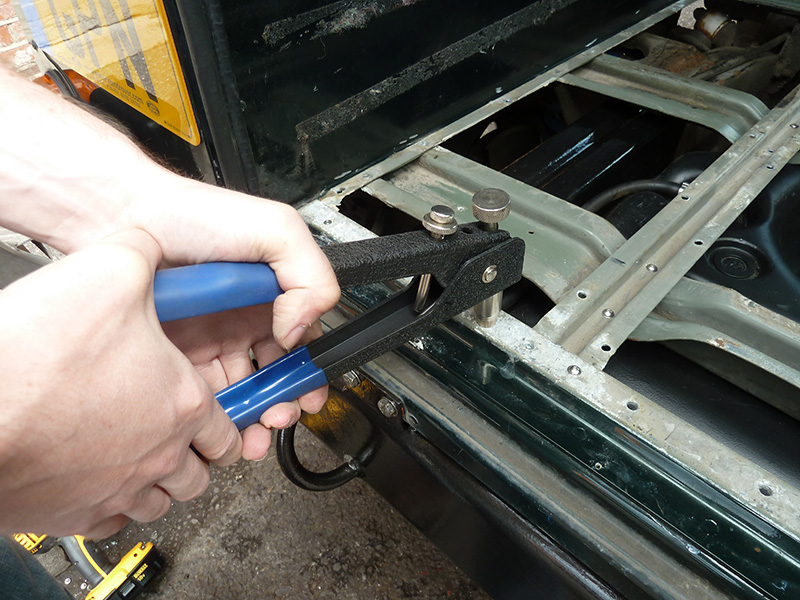
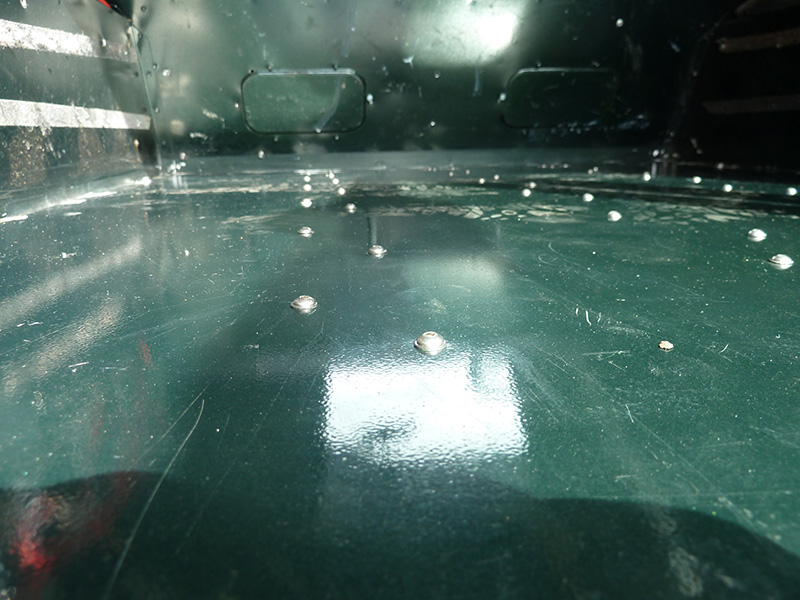
To refit the rear tub floor and mounting rails we decided to use bolts rather than rivets again as it will make it much easier to remove if we ever need access to the fuel pump without having to drop the tank again.
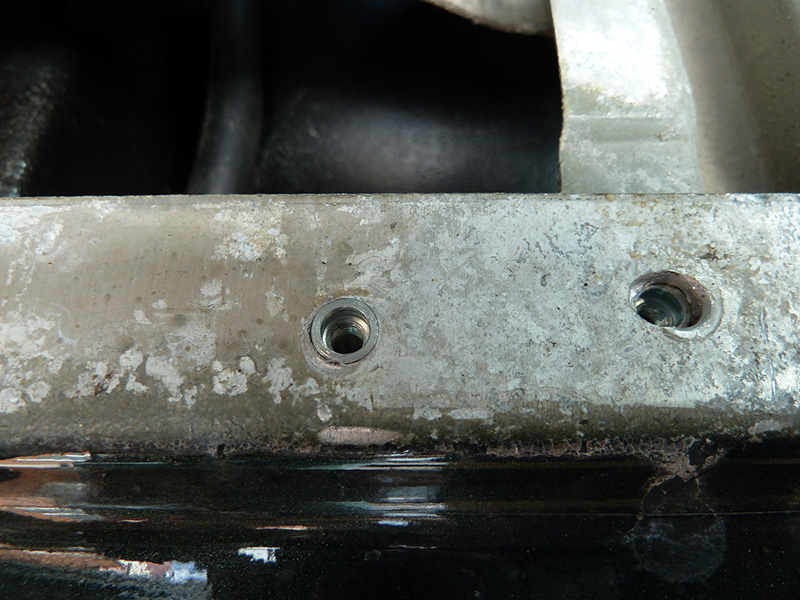
The support rails were fitted with M4 rivnuts which needed a 6mm hold which was the same size as the removed rivets.
The edges were fitted using M5 bolts with nyloc nuts.
Once the floor was fitted the front of the vehicle was sealed off with a dust sheet and the edges of the floor were primed and sprayed using cans of Epsom Green paint from Halfords.
The new spray cans now only have 300ml of paint rather than the 400ml they used to hold and it took nearly 3 tins to spray an even coat of paint on the floor and side panels in the rear tub.


David Rose
Are these Blacksheep cross members still available for a 90 300tdi/
Is there a number for Clive?
Ive looked but i can't see anything online.
many thanks david rose
Brian
David, I don't know if Clive is still making the crossmembers or have a contact number for him.