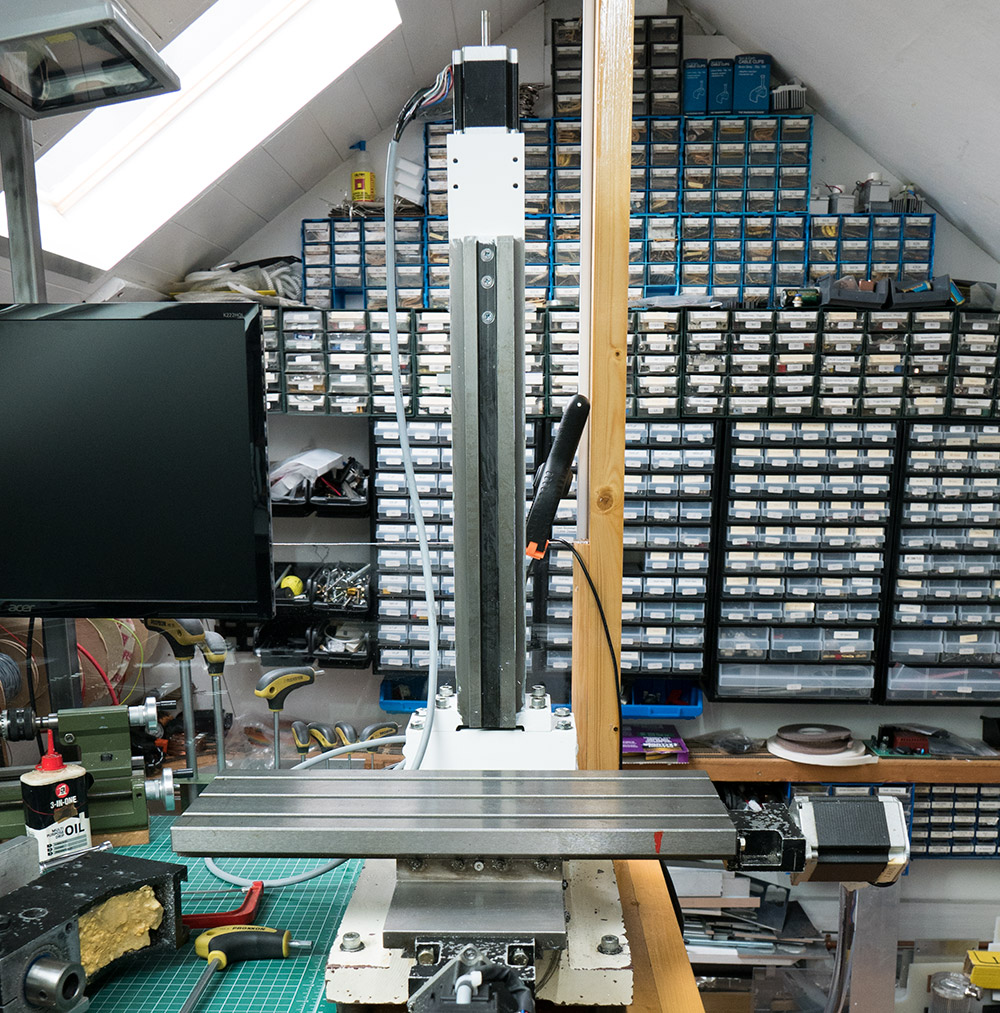
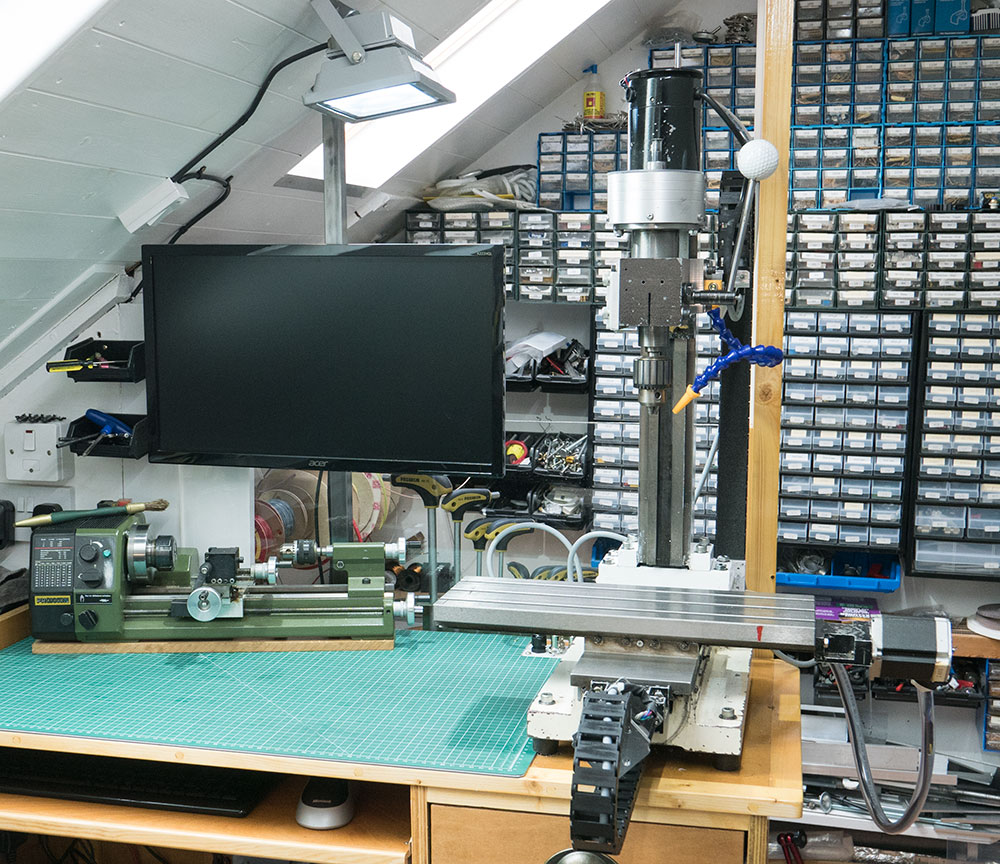
We have replaced the old adjustable Z axis on our DIY CNC milling machine with a new fixed vertical pillar Z axis, replaced the old stepper motor and ballscrew bearings with better quality versions and added an e-chain for the cables.
The original machine was an Axminster X1 Micro Mill which is also sold as other branded versions by other sellers.
The old mill had problems with vertical play in the Z axis when changing direction and the vertical pillar was leaning slightly forward so any holes drilled using the manual drilling arm always came out at a slight angle.
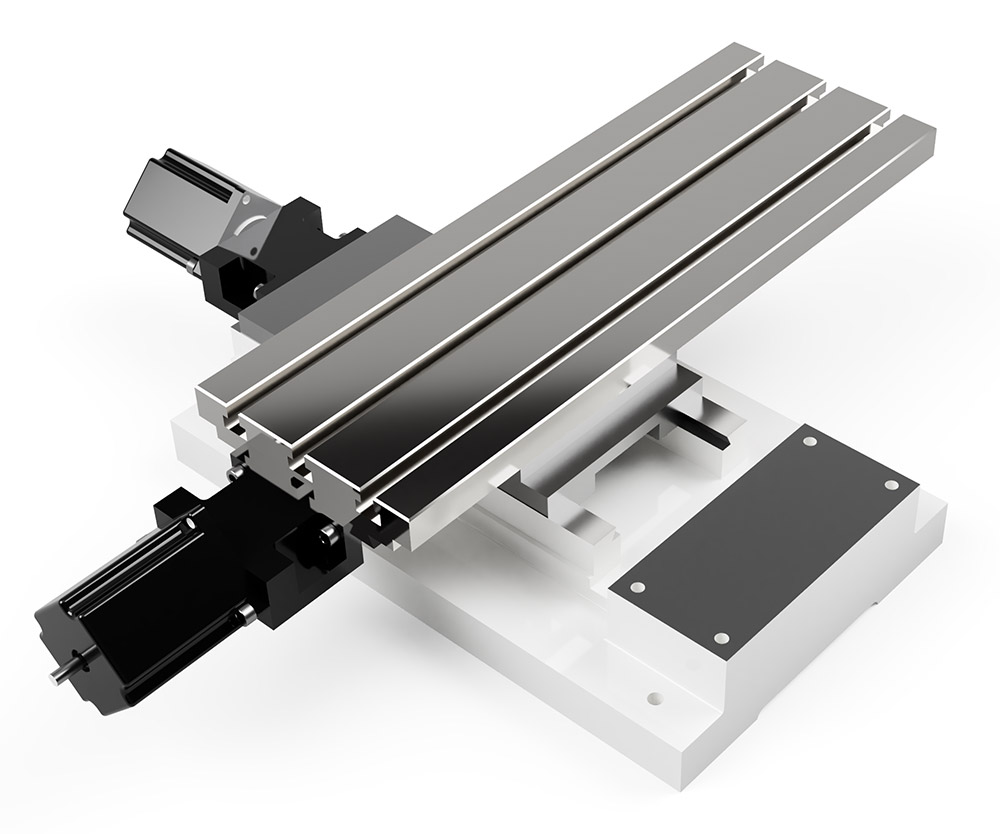
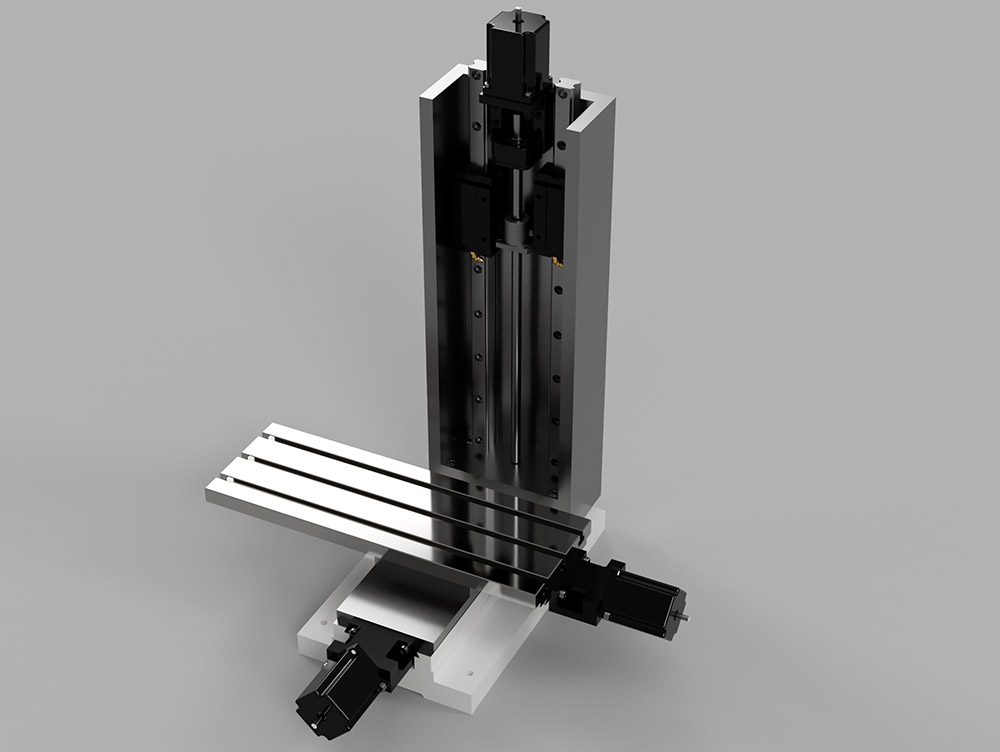
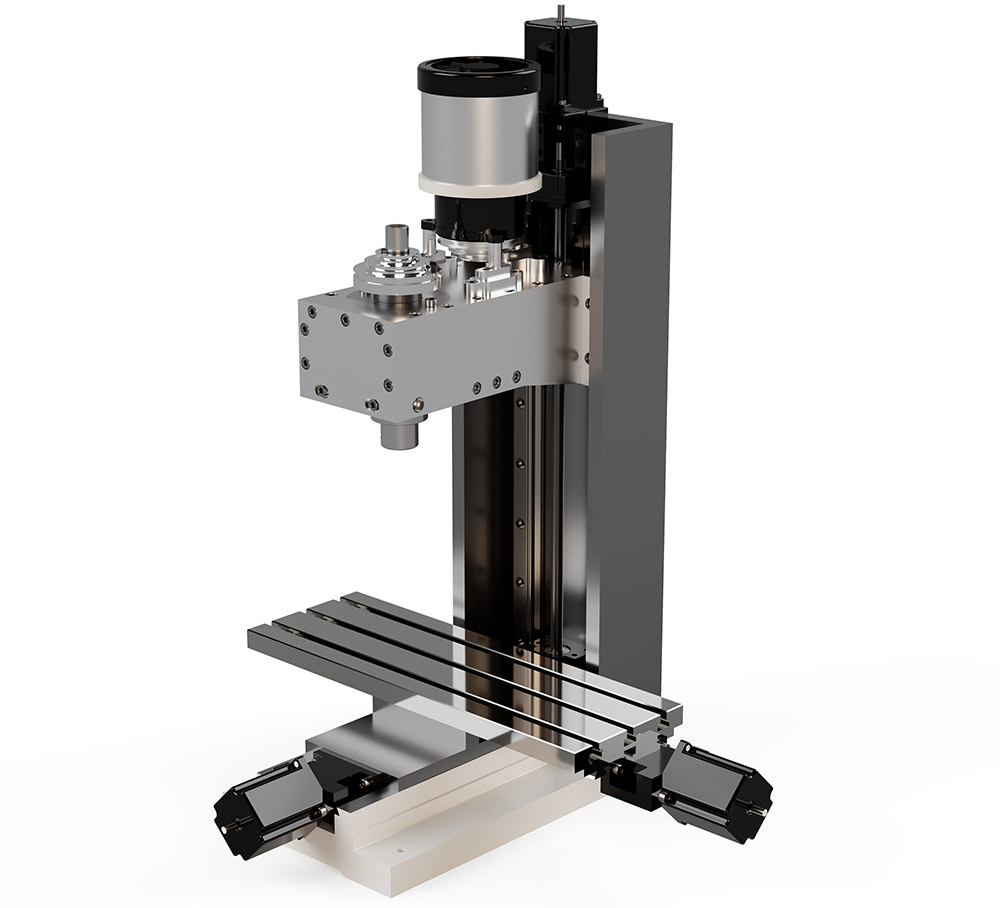
The new mill plan
Our original plan was to completely replace the old cast iron column with a custom-built one made from a 20mm thick aluminium plate and Andrew spent several weeks designing the mill down to each nut and bolt in Fusion 360 to design and prototype a new mill.
The new design was to use high-grade bearings and rails but after running the material simulations in Fusion 360 we found that the weight of the new aluminium Z axis would be more than double the weight of the current cast iron one so we decided to take a different approach and change the mill to use a fixed column rather than the old adjustable one.
The images below are renders from Fusion 360 of how the new mill was to look.
New fixed pillar
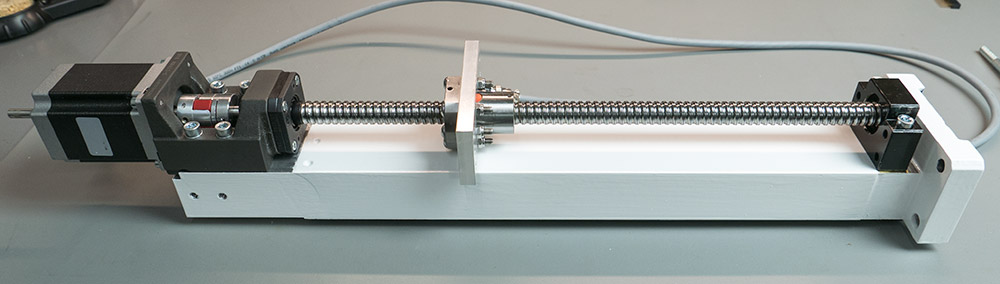
We ordered a new fixed X1-102 Column from Arceurotrade and made new mounting blocks and mounts to use on our mill.
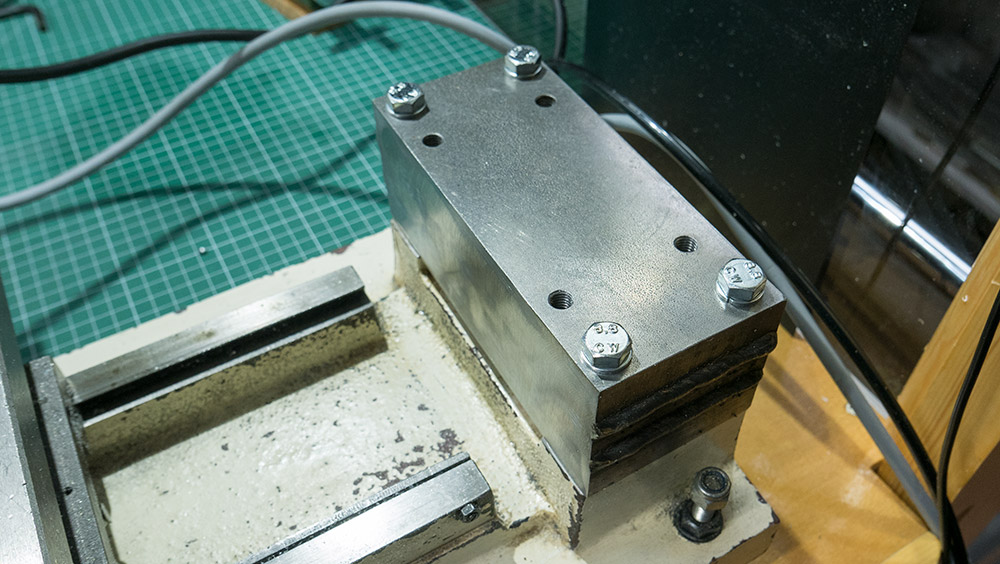
The spacer was made from a strip of 20mm thick steel which we cut into three pieces and welded together, to make a 60mm thick piece of steel, before drilling and tapping the new block to bolt onto the existing mill base and to the new mill column.
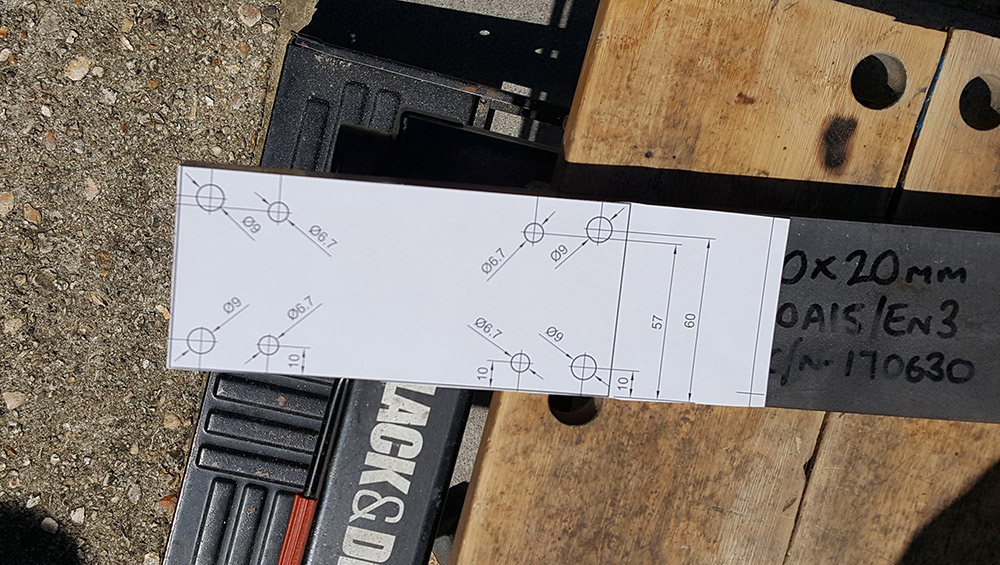

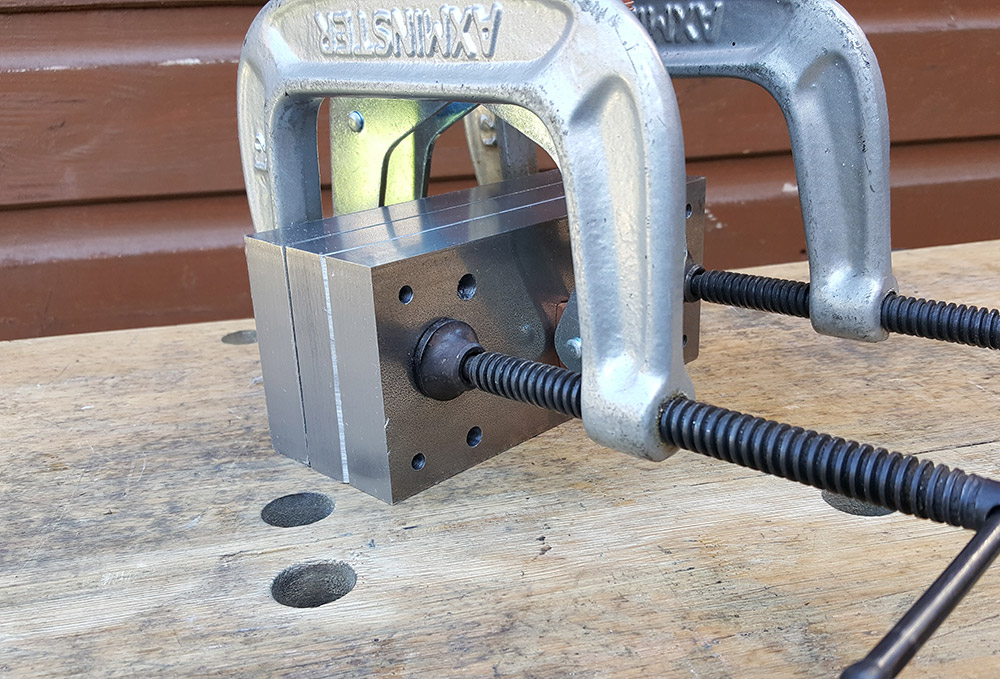
Next we fitted the old Z axis to the mill bed so we could machine the new steel block to ensure it was level with the mill bed. We found that the mill old cast iron base had a slight front to back incline which was levelled in the steel block before installing the new fixed column.
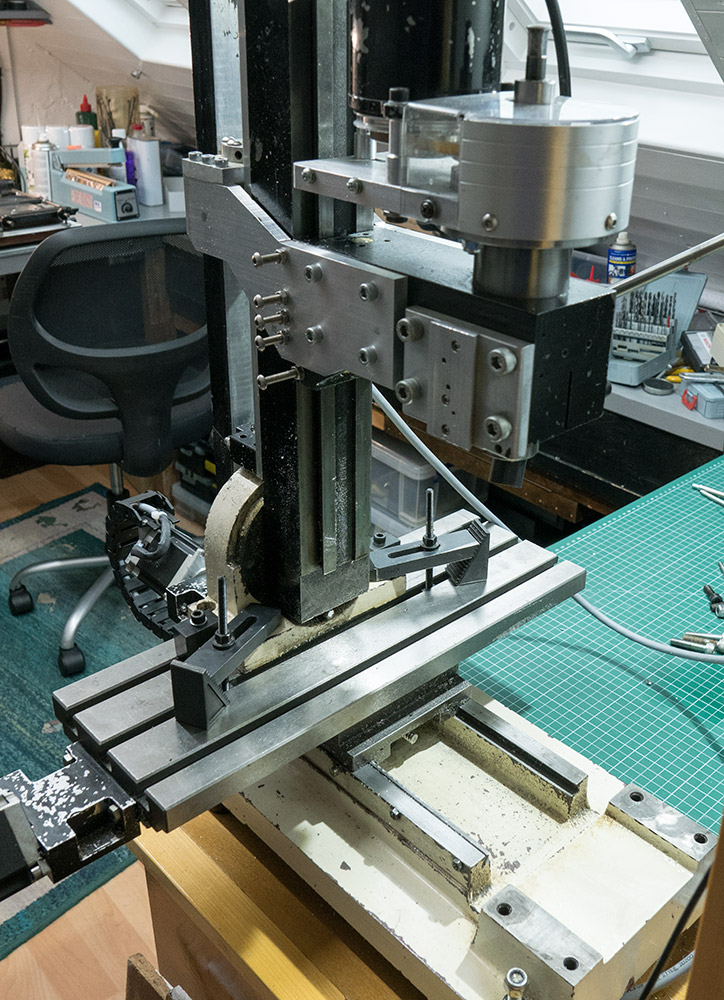
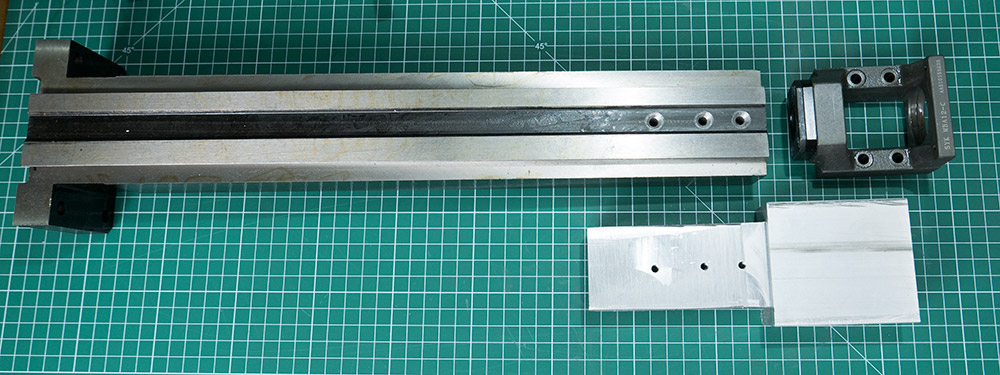
The old mill column had an adjustable base so it could be tilted to each side but this forced us to have the ballscrew bracket higher than the mill head which caused additional tilting issues. As this was no longer in the way of the side plates with the new fixed column, we could machine new straight side plates to transfer the drive from the ball nut to the mill head block.
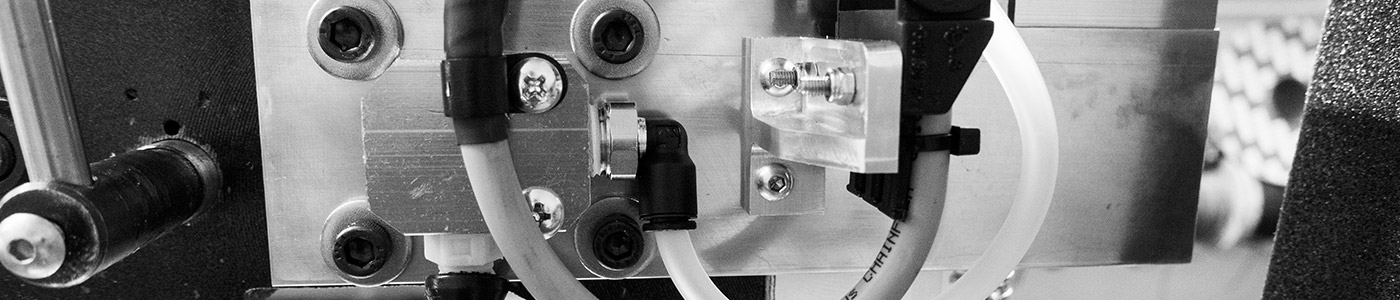
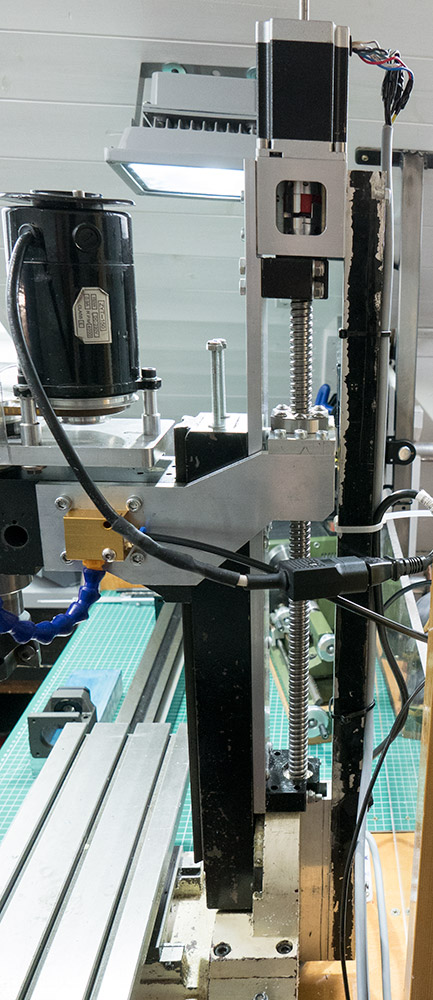
The new side plates were machined from a strip of 15mm aluminium bar and a new ballscrew bracket was machined from a 10mm aluminium bar. For the right side of the machine, we made a new custom bracket which holds a new e-chain from www.igus.co.uk for the motor power cable and air feed for the mill. We added a mounting plate on the steel block for the other end of the e-chain and for mounting the cables from the Y axis motor.
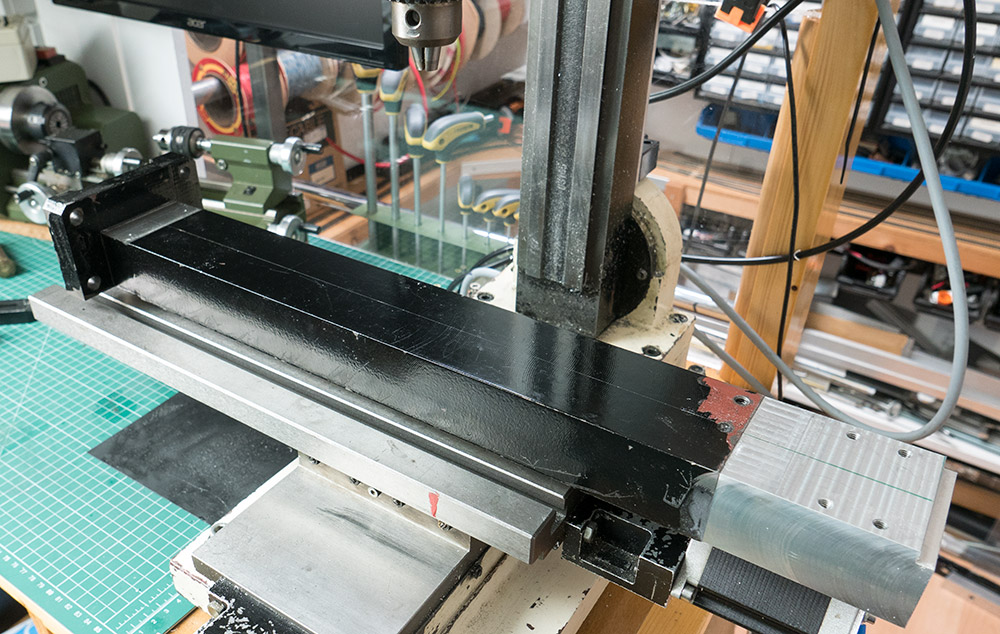
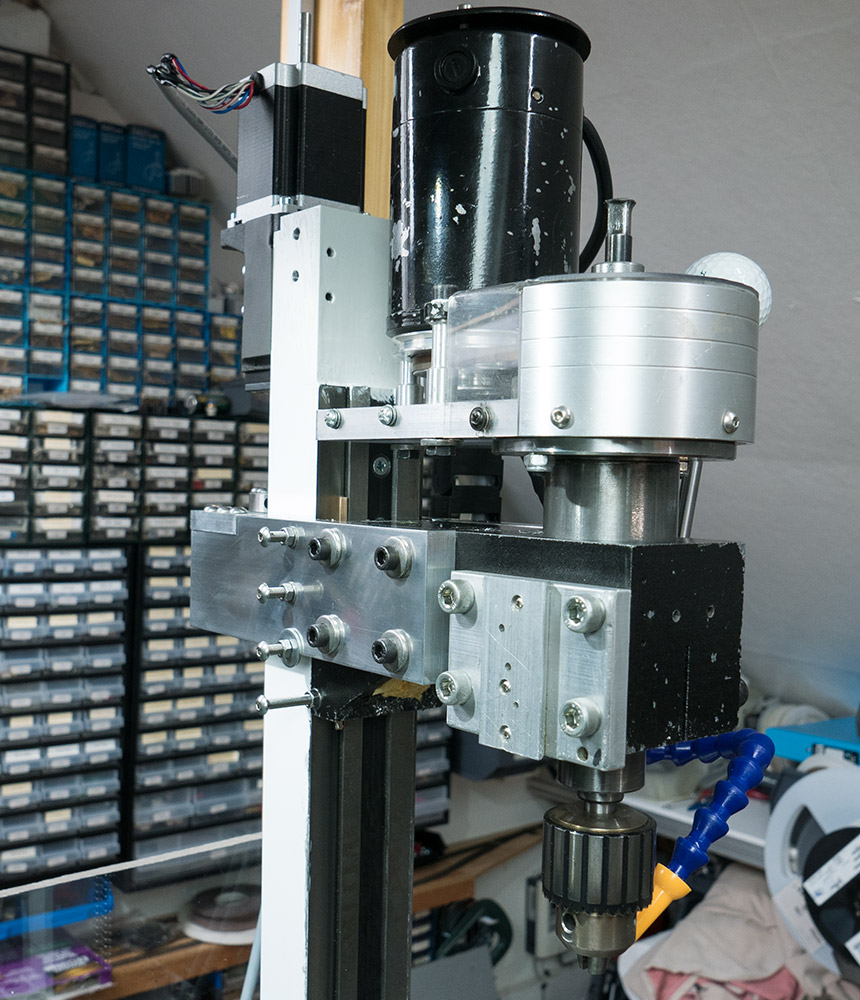
Once these had been fitted, we added the air feed and a custom bracket for the new e-chain which holds the motor power and airline. We will be adding power for the head LED panel and data cables for a DRO display in the future.
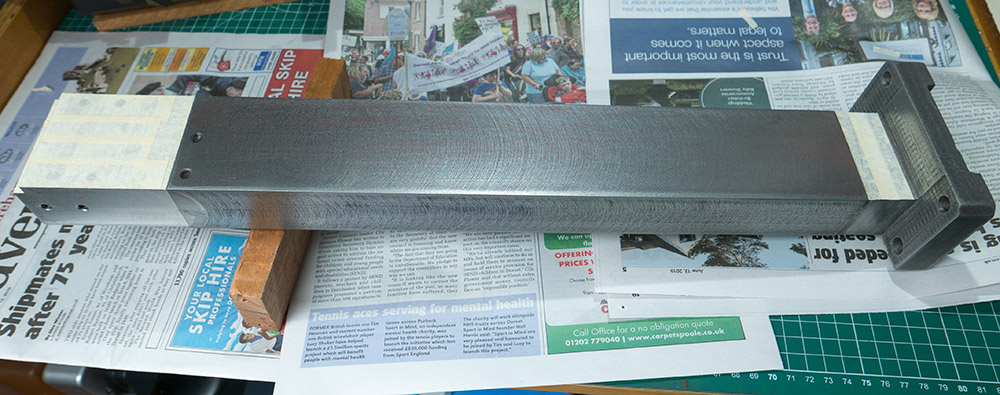
The new one-piece stepper motor mount is a lot stronger than the previous version and doesn’t flex as it did before.
On the new bench, we added a plate with four connectors for the stepper motors, motor drive, air supply and also a D-Sub connector which will be used for end stop sensors and the led lighting. This allows us to disconnect the mill without having to disconnect the wires from the stepper motor drivers as before.
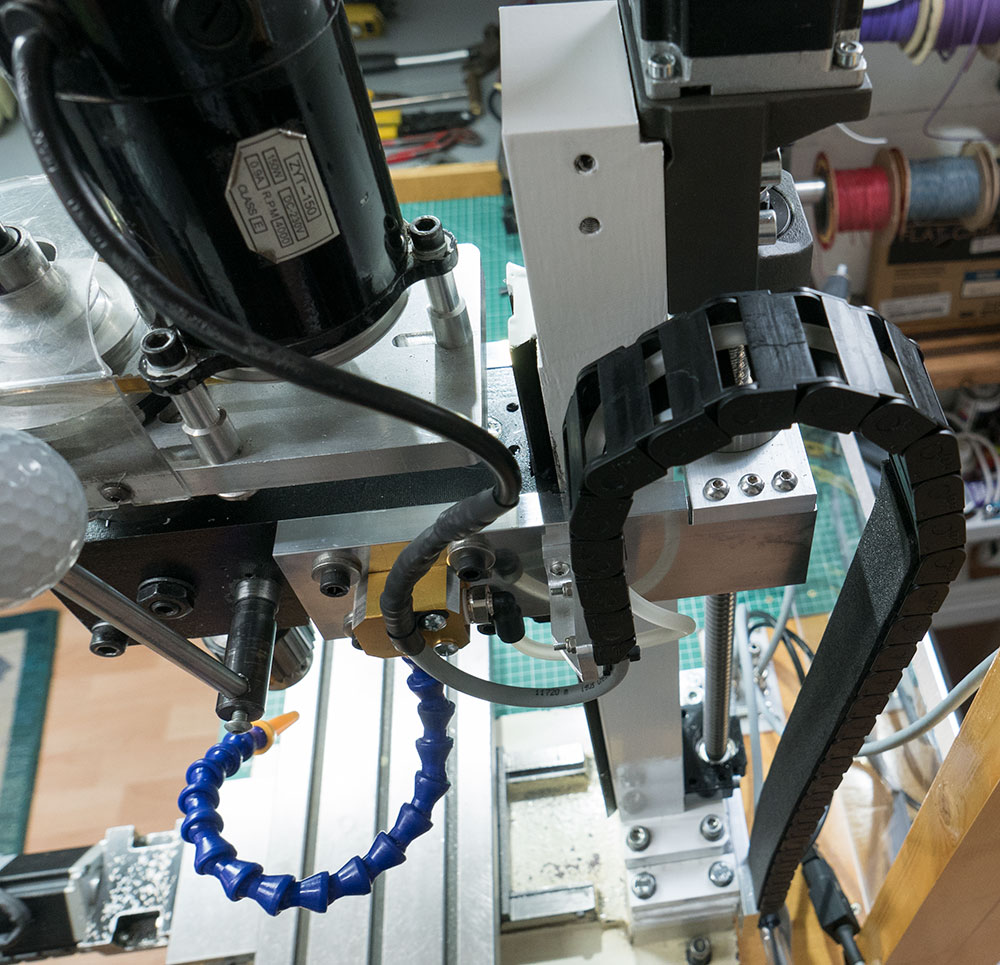

We added a new e-chain to the front of the machine on the X-axis and on the left head plate we added new adjustment bolts for the head.
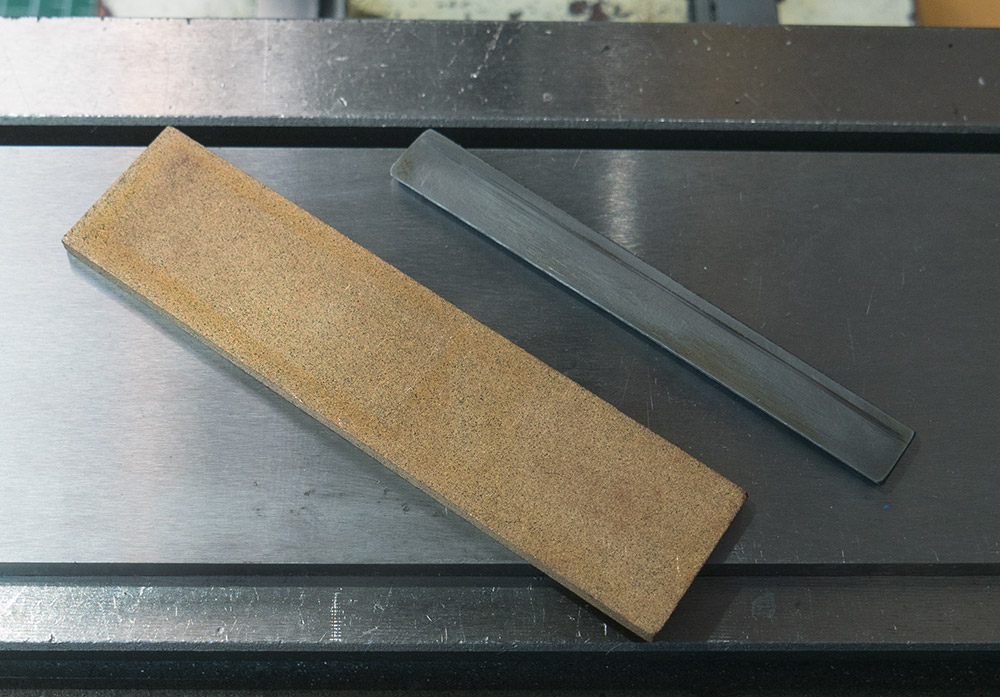
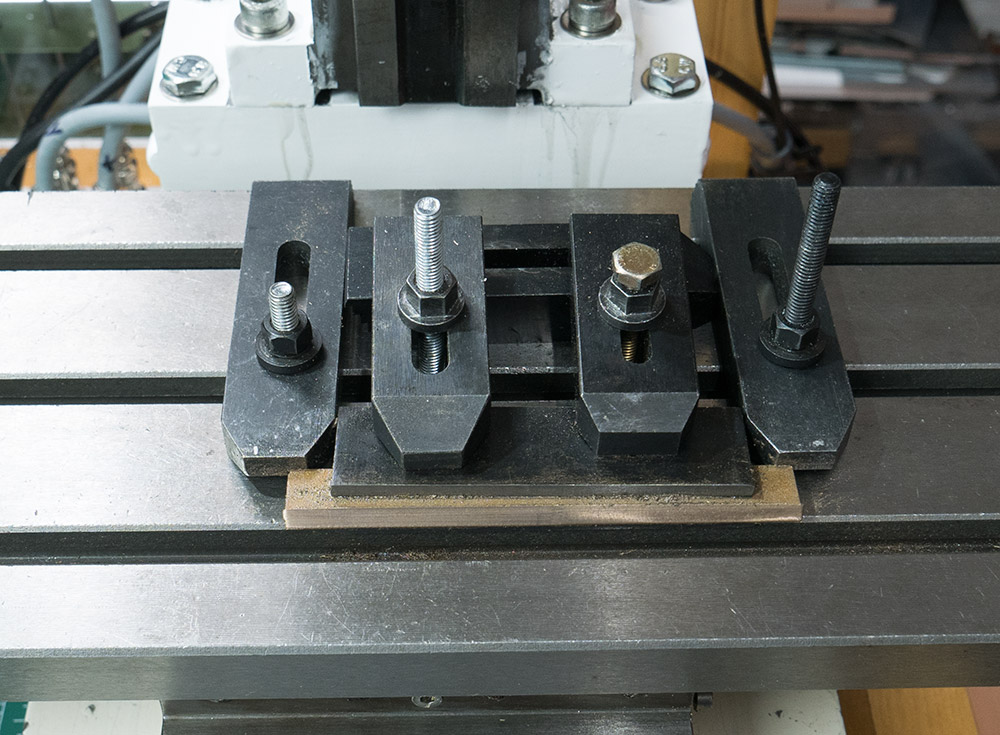
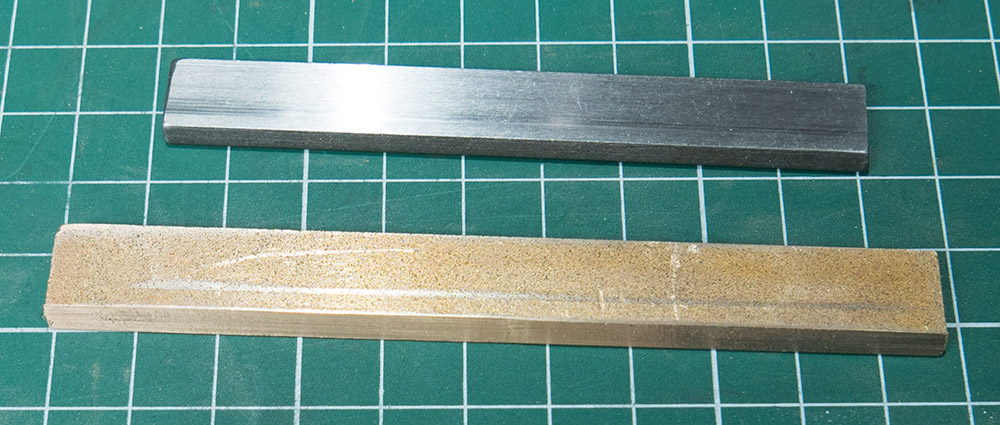
A new Gib Strip
The original Z-Axis Gib Strip was solid steel and we wanted to replace this with a sintered self-lubricating bearing. We found a manufacturer called Bowman who sells a product called Oilite® Sintered Plate Bearings which are supplied in custom sizes so we ordered a bearing plate to create a new gib strip.
The Oilite® material created very fine chips when machining and after soaking the new strip in oil for a few hours we installed it in the mill. The Z axis now moves much smoother than before and doesn’t have the vertical play issues the old column had.
Next, we are planning to add end stops and sensors and make a custom DRO display and joypad for manual control.
Below is a short video showing an overview of the machine and some of the milling for the upgrade.

Comments