Using our main Windows desktop PCs we often work from our Synology DiskStation NAS on video projects and using our 1Gb network we would copy the video assets and files to each desktop to edit before copying the completed files back to the NAS. With some of the 4K projects, this can result in large file transfers taking over an hour to synchronize each time.
Our main DS1817+ Synology DiskStation has multiple 1Gb network ports and the option to add an internal PCI-E 10Gb card.
We have a second DS1817 Synology DiskStation which is used to mirror the main NAS and this has two 10Gb ethernet ports built in using RJ45 connectors.
Our PCs have built-in 10Gb RJ45 ports in addition to 1Gb ethernet, so we thought the best solution would be to purchase a 10Gb network switch and use the Cat 6 cables we already have installed to link everything together with an uplink to the current 48 port switch which links all the other devices in the house.
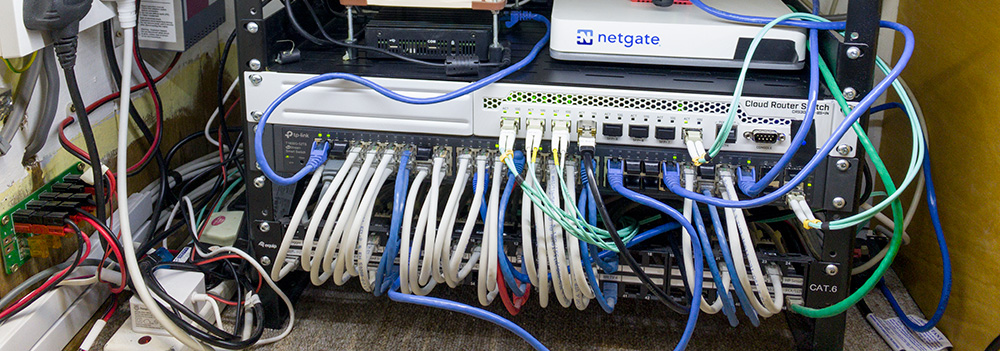
Our last major network upgrade was in August 2017 when we used a TP Link 48 port switch to replace multiple network switches in the house to a central location in an upstairs cupboard in a small 19-inch rack.
Our plan is to increase the file transfer speeds between our two workstation computers and the two Synology NAS systems and to purchase an 8 port 10Gb network switch and uplink this to our existing TP Link 48 port switch.
Finding a 10Gb Switch
After looking at a lot of different 10Gb switches, we decided to purchase a MikroTik CRS309-1G-8S+IN which is a desktop switch with one Gigabit Ethernet port and eight SFP+ 10Gbps ports.
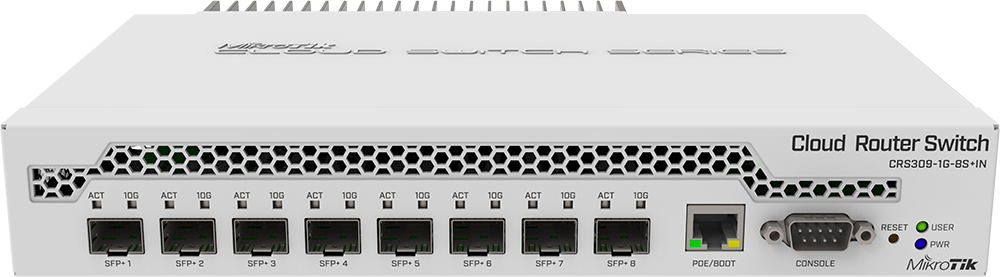
The switch can boot into one of two operating systems, RouterOS or SwitchOS depending on your needs. We chose the MikroTik switch over other models as it is fanless and silent in use and all the other 10Gb switches we looked at had cooling fans.
SPF+ Adapters
As the new switch only has SPF+ ports we needed to purchase additional adapters to connect to the computers and Synology NAS boxes.

We purchased 3 MikroTik S+RJ10 10-Gigabit 10GBASE-T SFP+ Modules with RJ45 Connectors to use with the desktops and backup NAS and decided to run a fibre patch lead to the main NAS which is located downstairs.
For this, we purchased a pair of MikroTik S-85DLC03D 10G Multimode Fibre SFP+ Modules with LC Connectors and a 20m Multimode Duplex LSZH Fibre Patch Lead (OM3). A Synology E10G17-F2 Ethernet Adapter was installed into the NAS to give us the required SFP+ port. This was the most expensive single item for the upgrades.
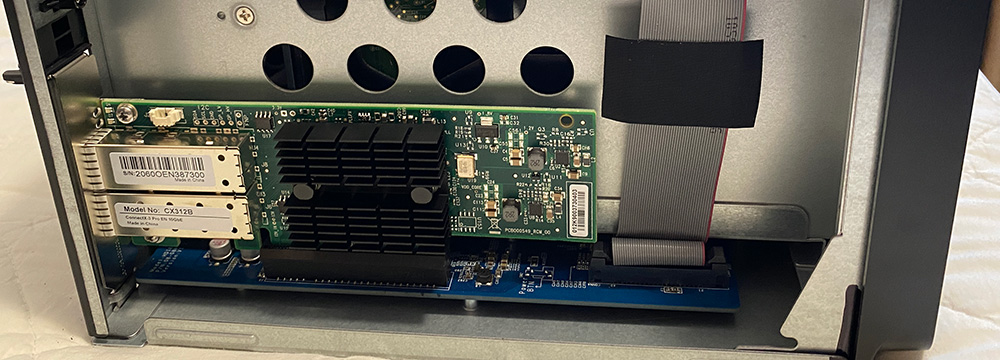
Synology E10G17-F2 Ethernet Adapter
To link the new switch to the TP Link switch we purchased a pair of MikroTik S-85DLC05D Gigabit 1000BASE-SX Multimode Fibre SFP Modules with LC Connectors and a short 0.5m fibre patch lead.
Routing the new fibre patch leads involved a lot of work throughout the house and lifting of floorboards and running a new 10m long metal conduit below part of the foundations to access the main Synology NAS.
We initially thought that running the metal conduit would be straightforward and not take very long as it would run alongside the existing plastic conduits which the old network cables are in but we soon found that the plastic conduit was running over and under large stones under the concrete slab and Andrew spent three days digging a narrow channel in the hard-packed stone and clay which the house is built on. This was done using a selection of metal rods with various hooks and shovels on the end to loosen the soil and extract the stones.
Once everything was in place, we could connect the computers and install the necessary drivers for the 10Gb network adapters and check everything was running.
Network Setup
We connected a laptop to the management port using an RJ45 cable and loaded the MikroTik management software. This allowed us to set a static IP address, but we could not find any way to set up the new switch to act as a switch as it was booted into its router operation system.
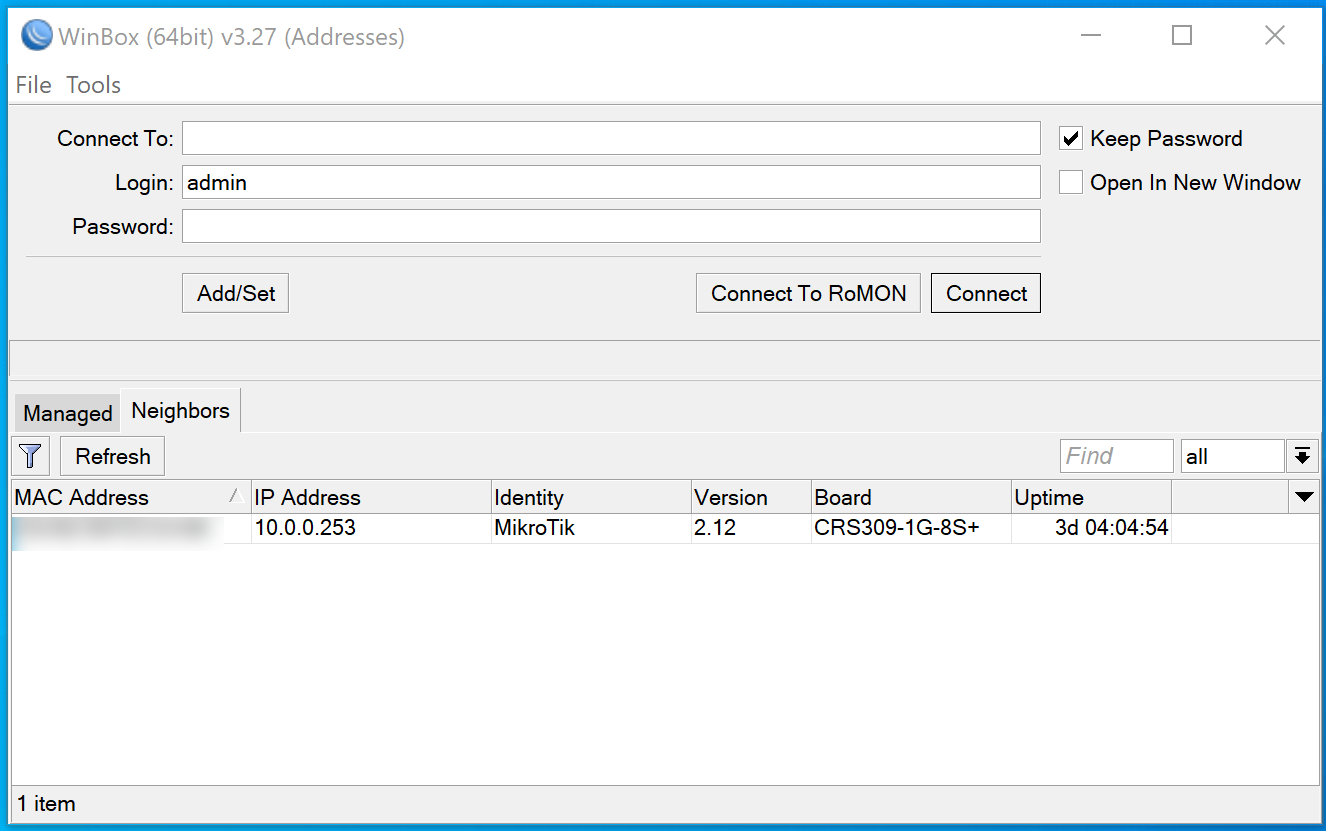
After a lot of searching online, we found this video which explained how to change the switch to boot into its SwitchOS mode, after doing this we were able to access the internet again on the new 10Gb connections and configure the switch.
Cable issues and hot adapters
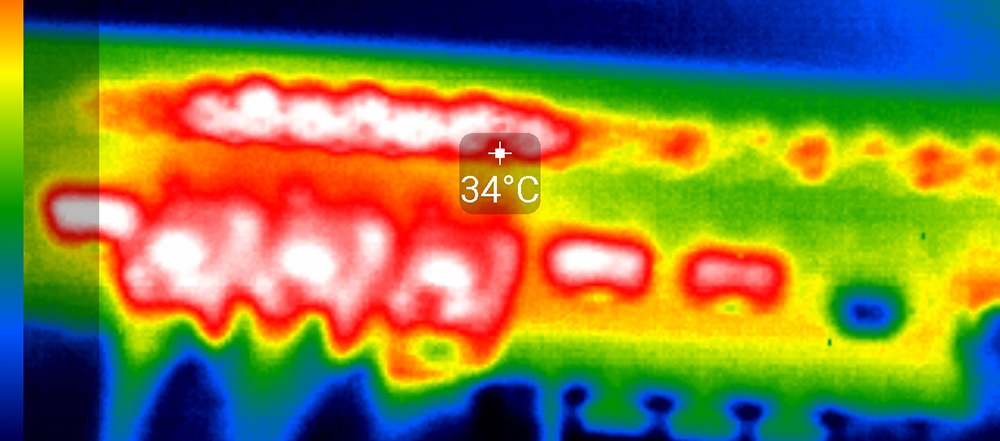
With the new higher-speed network up and running we ran some speed tests and found that the downstairs computer had a slower transfer speed than the upstairs computer but was still much faster than the 1Gb network. Checking the switches admin pages showed that the SFP+ to RJ45 adapters were running at an extremely high temperature of up to 90 degrees Celsius and far too hot to touch.
The different network speeds between the machines also showed that there must be a cable issue between the computer and the switch so we then decided that rather than replace the CAT 6 cable it would be better to purchase additional SFP+ to Fibre adapters and install PCI Express cards in each computer to have direct fibre connections between each. SFP+ adapters have a lower power consumption and temperatures compared to CAT6 adapters so it will lower the network running costs.

I ordered the cards and adapters from a manufacturer on Amazon called 10Gtek which have PCI-E network cards with an Intel chipset and 10Gb/s SFP+ SR Multimode Transceivers at a lower price than other models. I also ordered two 10m fibre patch leads.
Fibre to the workstations
We removed the floorboards again and ran the new fibre from the switch to each computer and after installing the drivers the computers both connected at 10Gb and the file transfer speeds were much higher.
Testing the speeds
I have a rendered video file which is 30.8Gb and we tried different transfers between the computers with the following results:
| Network Speed | From | To | Average Speed and Time |
| 1Gb | Desktop NVME | Desktop NVME | 4:50 - 106.2 MB/s |
| 1Gb | Desktop SSD | Desktop SSD | 4:50 - 106.2 MB/s |
| 1Gb | Desktop SSD | Synology NAS | 4:50 - 106.2 MB/s |
| 10Gb | Desktop NVME | Desktop NVME | 0:34 – 905 MB/s |
| 10Gb | Desktop NVME | Desktop SSD | 1:20 – 385 MB/s |
| 10Gb | Desktop SSD | Desktop SSD | 1:25 - 362.35 MB/s |
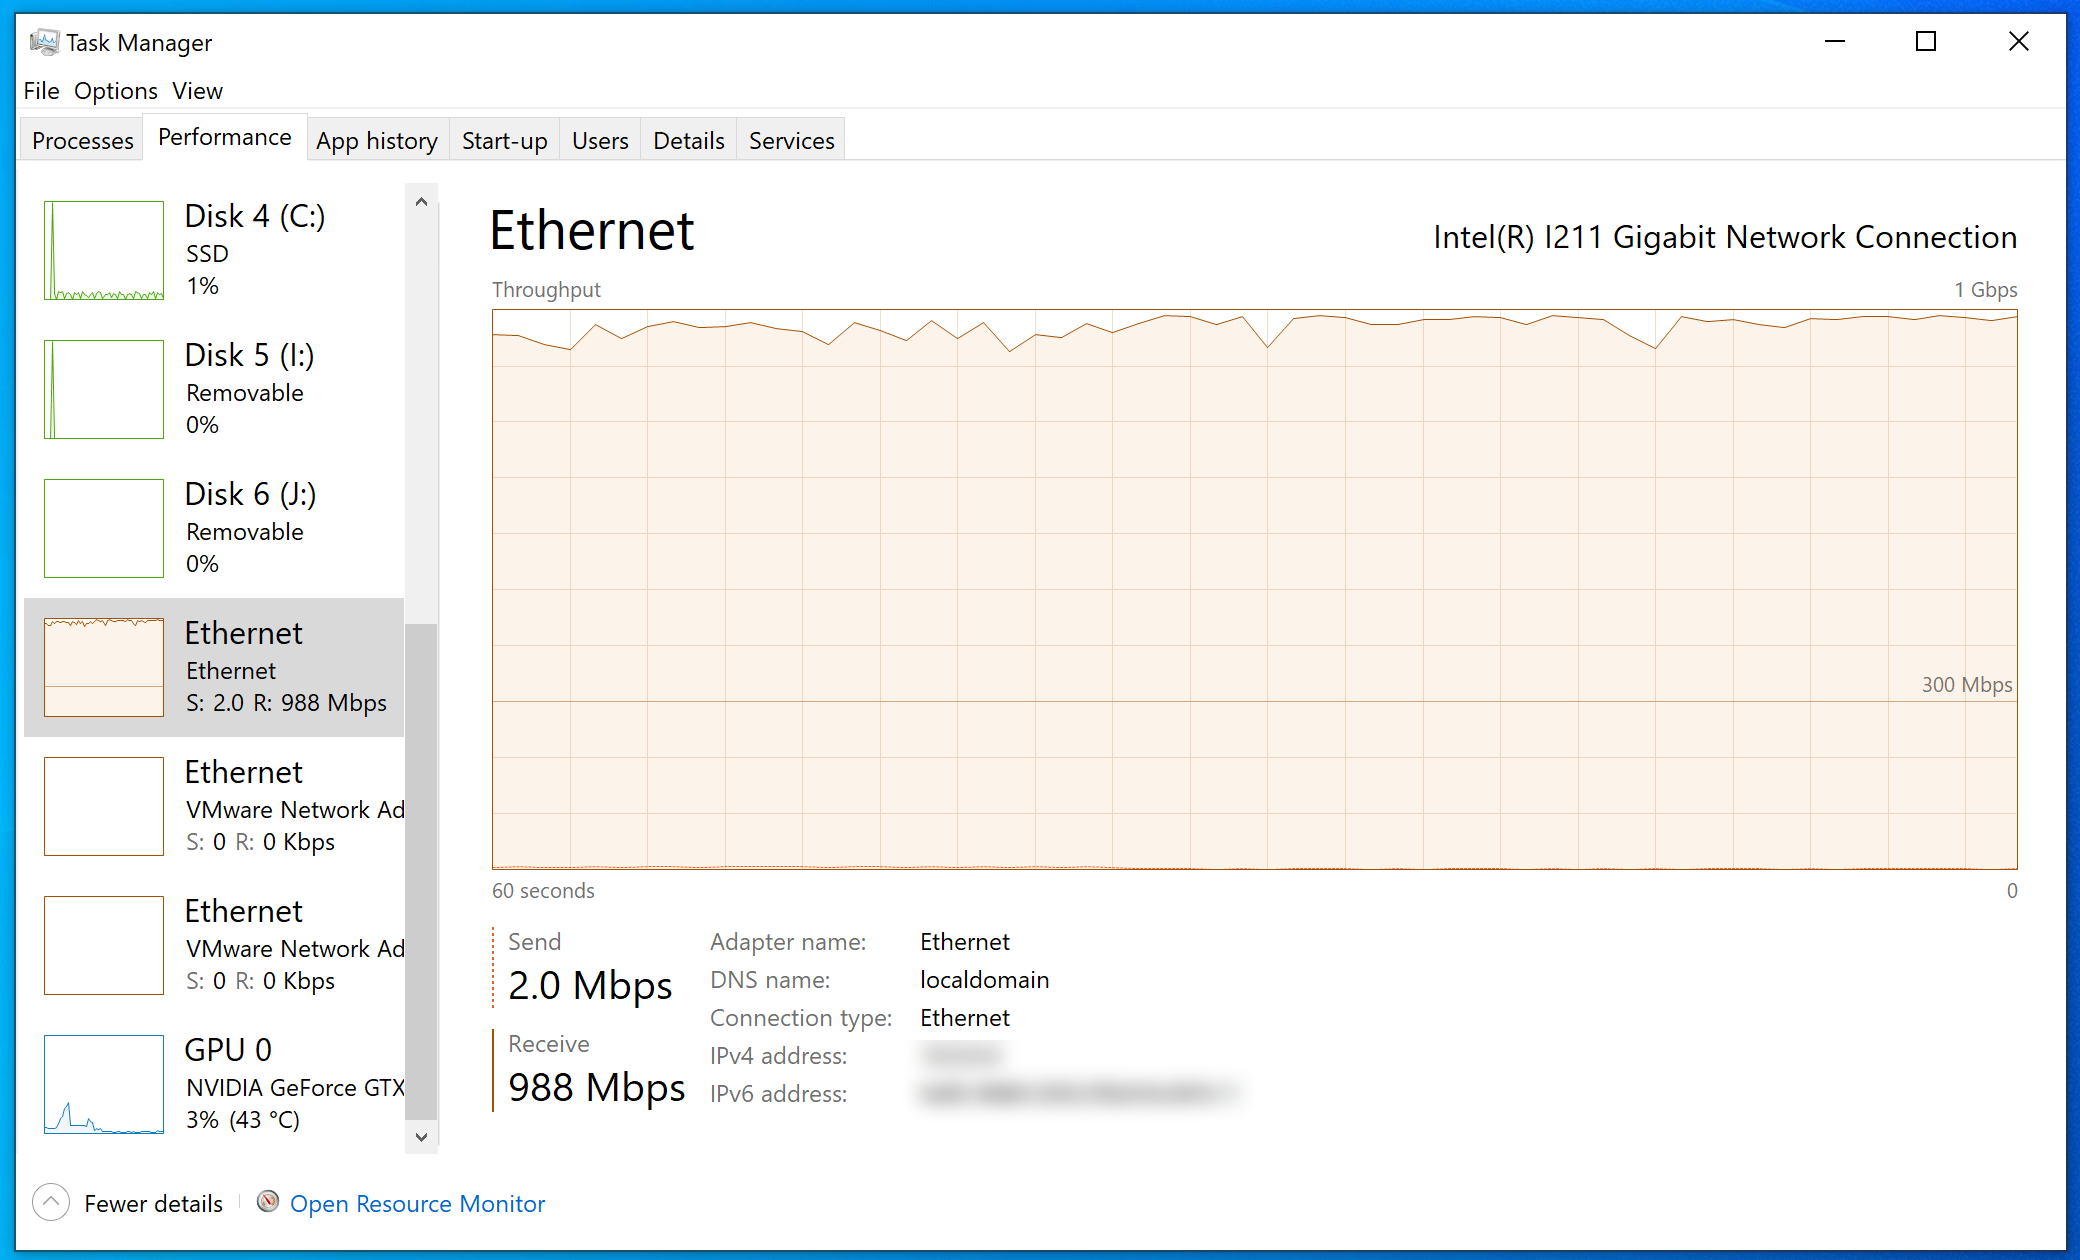
| 10Gb | Desktop SSD | Synology NAS | 1:15 – 410 MB/s |
| 10Gb | Desktop NVME | Synology NAS | 1:13 – 422 MB/s |
| 10Gb | Synology NAS | Desktop SSD | 1:05 – 474 MB/s |
| 10Gb | Synology NAS | Desktop NVME | 1:03 – 489 MB/s |
We also tested this using a 10Gb file with similar transfer rates. We ran each test 3 times and took an average speed to give the above numbers. The limitation for copying using the SSD drives must be the drive itself and the SATA interface with the NVME drives running at a much faster throughput.
1gb file copy speed
Task Manager showing 1Gb speeds
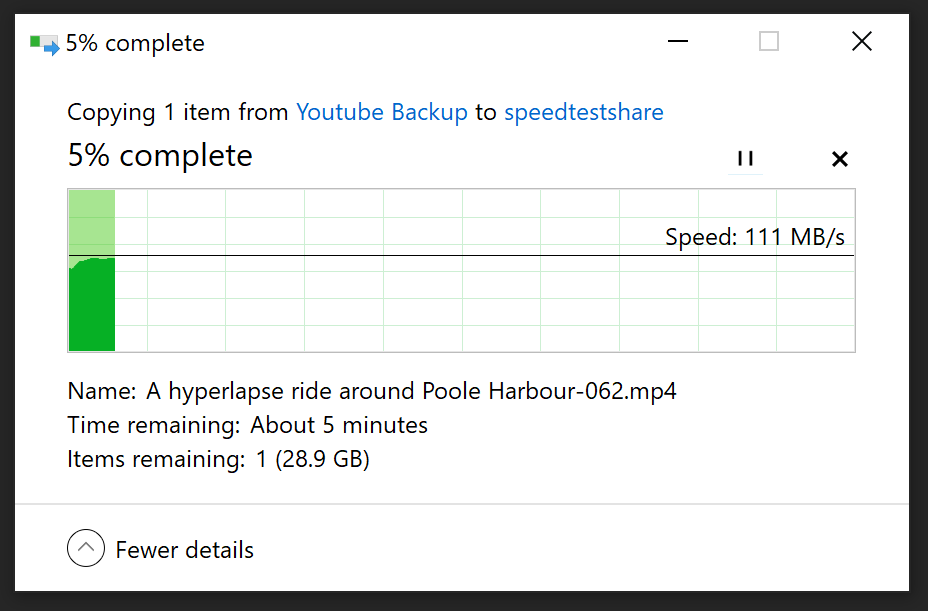
For the larger file transfers over 10Gb, we found that the transfer would initially start very fast and then settle down to a sawtooth pattern on the windows file transfer dialog as you can see on the screen capture below.
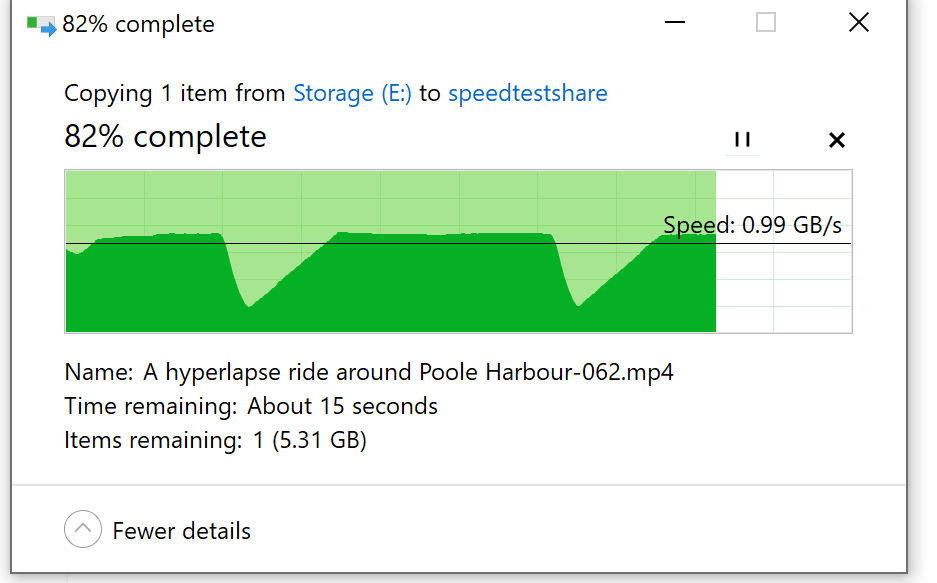
10GB NVME to NVME transfer speeds

10GB NVME to SSD transfer speeds
Parts Purchased
Below is a list of all the items purchased for the network upgrade. We would have saved £135.08 if we had purchased the fibre cards and adapters in the first place rather than the SFP+ to RJ45 modules.
The total upgrade cost was £1171.63
MikroTik S-85DLC05D Gigabit 1000BASE-SX Multimode Fibre SFP Module, LC Connector
MikroTik S+RJ10 10-Gigabit 10GBASE-T SFP+ Module, RJ45 Connector
MikroTik S-85DLC03D 10G Multimode Fibre SFP+ Module, LC Connector
EssCable LC - LC 0.5m Multimode Duplex LSZH Fibre Patch Lead
EssCable LC - LC 20m Multimode Duplex LSZH Fibre Patch Lead (OM3)
Synology E10G17-F2 Ethernet Adapter
10Gtek [4 Pack] 10Gb/s SFP+ SR Multimode Transceiver, 10GBase-SR SFP+ LC
10Gtek® 10GbE PCIE Network Card for Intel X520-DA1-82599ES Chip, Single SFP+ Port
LC to LC Fibre Patch Cable 10m
Dust Cover, AMP SFP Cage Connectors
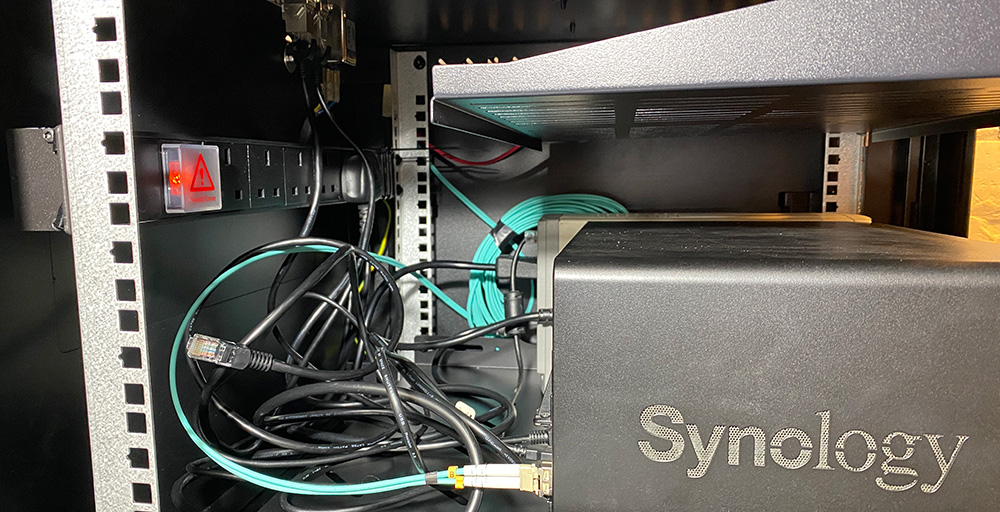
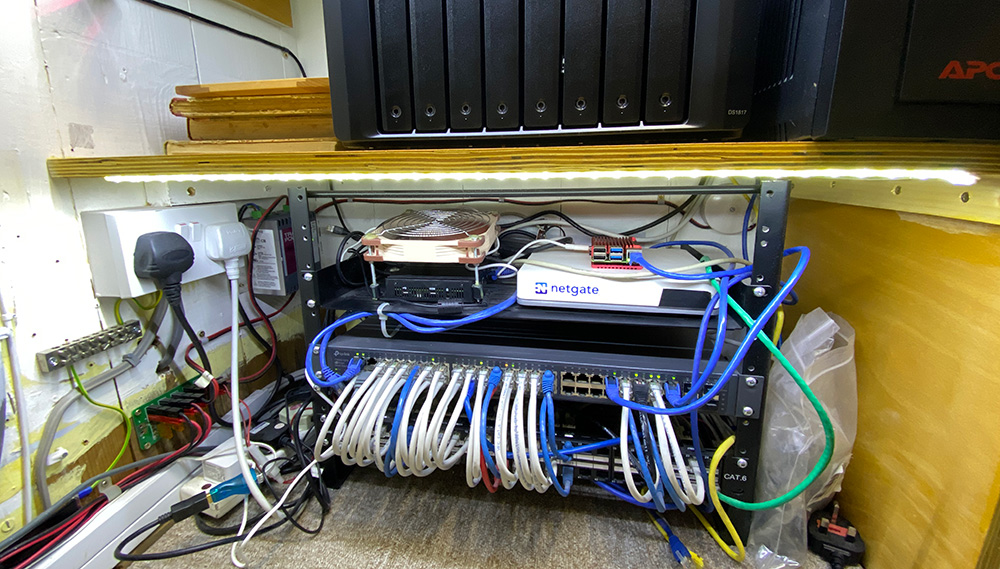
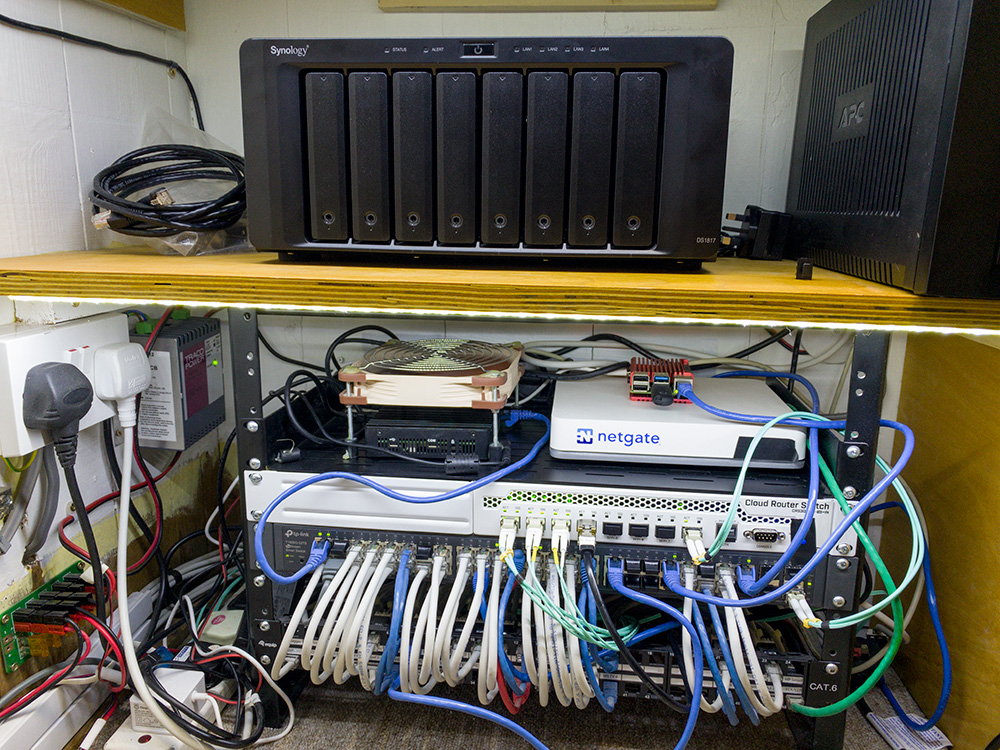
Network enclosure with the side removed
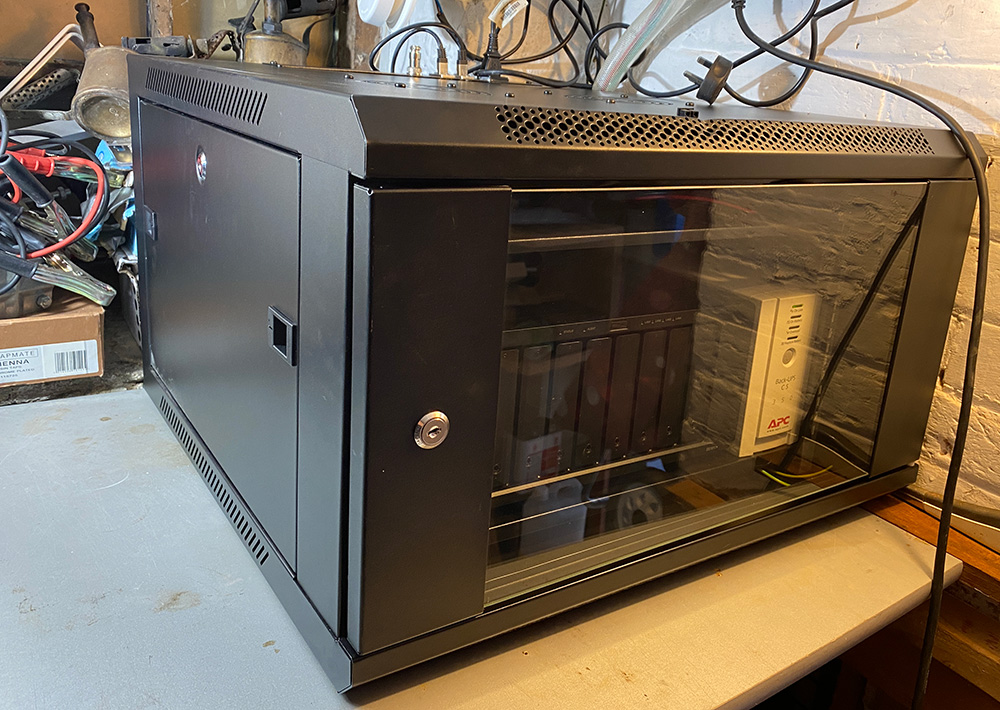
New Nas enclosure

Michael
Who do you use to host your website? Thanks!
Brian
We use https://www.rapidswitch.com/ for our websites and have dedicated servers with them