After picking up the new Ford Focus last week I wanted to install a dash cam so in the event of us being unlucky enough to be involved in an accident there will be video footage of the moments before and after the event.
After watching a lot of reviews on YouTube of different dash cams and reading a lot of tech blog reviews I found the Nextbase iN-Car Cam 512G from https://www.nextbase.co.uk/dashcams/in-car-cam-512g/ which is a fairly compact model with a built-in lens polarising filter to reduce reflected glare from inside the car and also had some of the better quality video footage compared to other models in the same price range.
I had looked at a dual camera system which was almost double the price and a lot smaller but the video quality was not as good as the cheaper Nextbase 512G model which has a much larger lens.
I purchased the camera from our local Halfords (http://www.halfords.com/) in Poole and they had a special offer where you got an 8Gb card and soft case included for free but after getting to the shop they said that I had to reserve it online to get the extras so I placed the order on my phone in the shop and picked it up straight away!
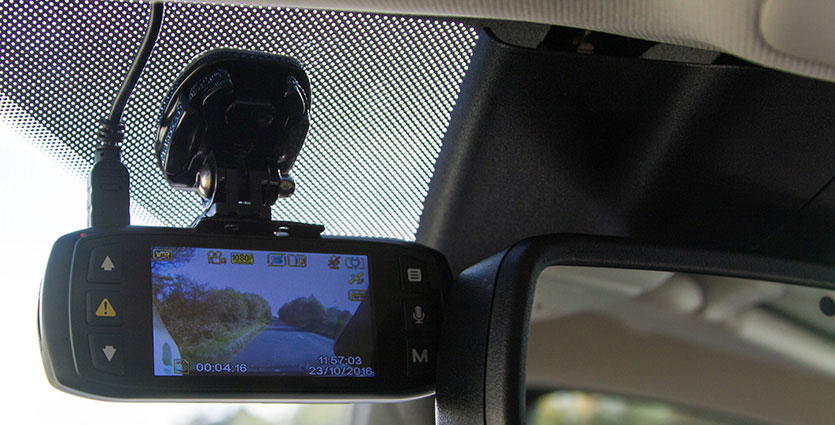
After getting home with the camera I found that the supplied suction mount and bracket were very long (see photo from the Nextbase website below) and when fitted in the car the lens was over 20cm (8”) from the windscreen. The windscreen on the Ford Focus is very shallow and so we had to find a way to make a much more compact mount to get the dash cam as close to the glass of the screen as possible.
Photo showing supplied suction mount from Nextbase

We removed the top mount from the dash cam which was made from two plastic mouldings and was screwed on the sides with four small screws, after removing the first part of the bracket we found the GPS antenna which was soldered on a short coax cable into the lower part of the bracket. We unsoldered the GPS antenna and then removed the lower part of the factory bracket mount which was held down with another four small screws.
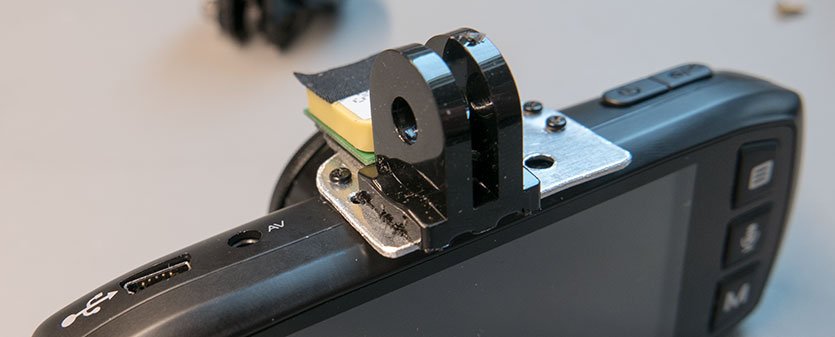
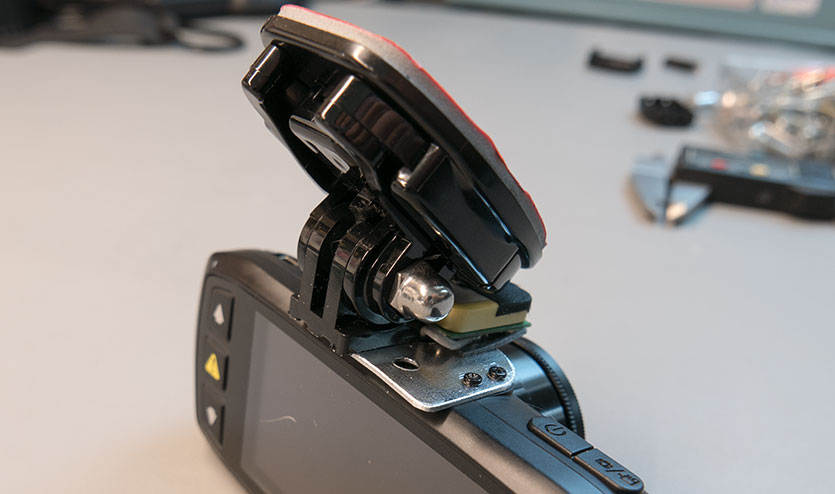
We found a spare bracket and glass mount for one of my GoPro cameras and after trimming the connecting mount which came with the GoPro we could fit this to the top of the Nextbase 512G with the addition of a small aluminium adapter plate which we cut from some 1mm aluminium sheet. The photos below show the new adapter plate fitted to the dash cam using 3 of the 4 screw holes and the GoPro mount fitted using a self-tapping screw from the bottom.
We fitted the mount offset from the centre to allow us to fit the dash cam into the car and have it as close as possible to the top of the windscreen and be hidden beside the main sensor block on the car.
The GPS antenna was soldered back onto its coax lead and then fitted to the adapter plate using double-sided sticky pads in front of the new mounting bracket.
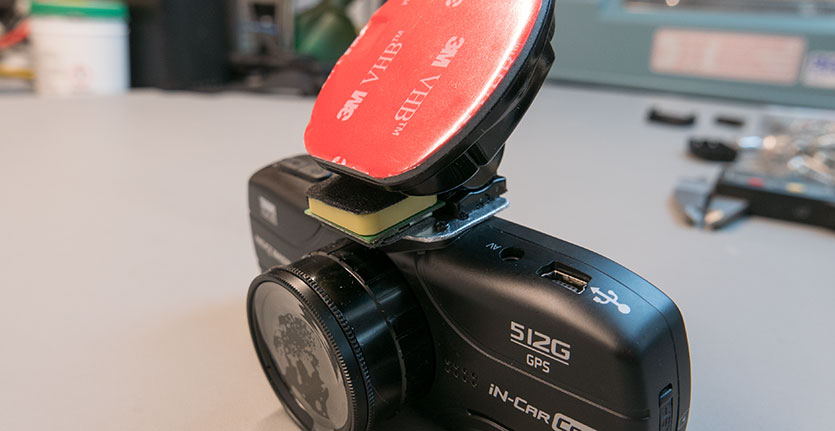
The GoPro quick release plate allows us to easily remove the dash cam if needed from the windscreen once the self-adhesive mount had been installed.
The original power lead was fitted with a cigarette lighter plug adapter and as we wanted to install the dash cam permanently and turn it on with the car ignition, we needed to modify this to have the DC-DC converter connected to an ignition-controlled supply from the internal fuse box.
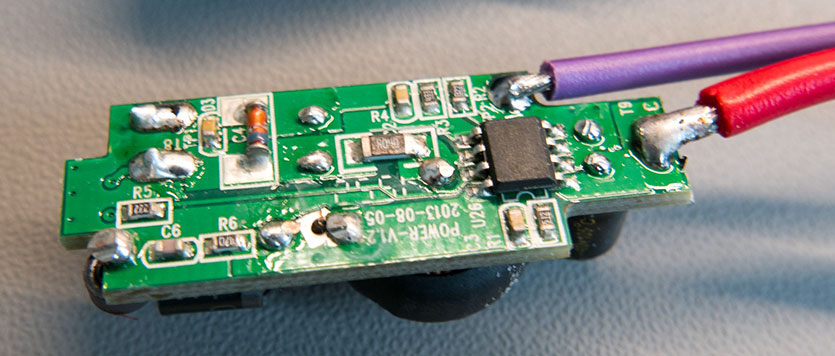
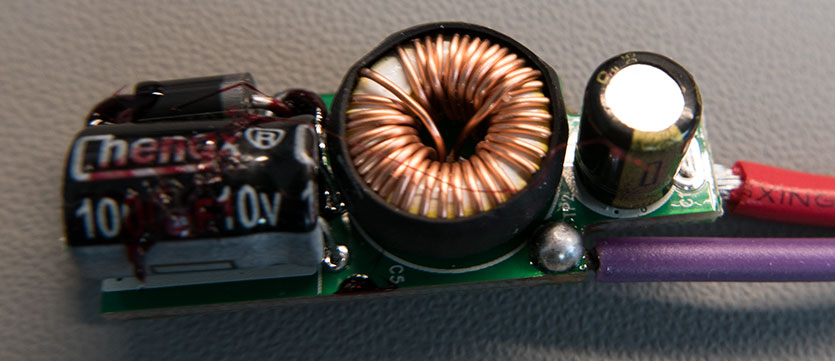
We removed the plastic cigarette lighter plug adapter case and found a simple switching supply which had a spring fitted to one end and the 5V DC output soldered on the other end of the board.
To obtain an ignition-controlled 12V supply we checked the car manual for the internal under-dash fuse box and found that fuse number F87 which controls the heated steering wheel which we don't have and was easily accessible and only powered on with the engine.
I used a car fuse piggyback adapter to go in place of the F87 fuse and installed the old fuse into the adapter and used a 5A fuse for the dash cam supply.
The power adapter was then soldered onto new cables which connected to a ground point under the dashboard and then to the new fuse adapter. The 5V USB lead to run to the dash cam was installed behind the roof lining from the dash cam and then down the side of the door trims and then through a hole in the side of the dashboard to route it to the fuse box.
The power adapter board
Once the installation was complete we had to adjust the lens polarising filter to minimise the reflections from inside the car and then it was ready to use.
The lens on the dash cam has a 140-degree wide-angle view and even with the camera being mounted very close to the windscreen there is still a small amount of the interior of the car being shown on the edges of the image but it is not enough to cause any problems with the recordings.
Once the mount was completed and we had tested the camera in the car we removed it again and painted the new bracket and mounts with matt black paint so they wouldn’t show from outside the car. We also covered over the bright white logos and stickers on the camera to reduce its visibility
Demo Video
The video below shows four sample clips recorded in the car on an overcast afternoon, a sunny day, overcast with rain and dusk with rain in town.
Peter
Good write up, did the adhesive pad adhere well to that section of the top windshield having the metallised perforated area?
Brian
I didn't have any issues with the sticky pad on the windscreen texture. It hasn't moved yet on the screen!
Tj
I am about to buy the 3rd one of these. Great camera but for get adding a rear view for parking, the screen is to small. Works well as a speed check reminder.